Working for long hours on our Windows computer now looks like a fantasy. No, I’m not saying this but maybe my reciters are thinking so. Okay so don’t worry because we understand the annoyance generated by this blue screen aka Kernel Security Check Failure. Who interrupts us in the middle of our work. It looks exactly like this, Right? You all must be aware of it and if not then this is the picture.

This blue screen is not so cool. But, what does this mean? This basically means that your PC is facing Kernel Security Check Failure. In the present scenario, It is a common problem faced by Windows users. We have brought some super cool methods for you to handle this failure so sit back read and relax.
What exactly causes this error?
We are so results-oriented that we do not even bother to learn the reasons for any tragedy happening. In this case, it is very important to know the cause of kernel_security_check Failure and after that, the next step is to hunt for solutions. Now basic reasons for this failure are Corrupted Windows System Files, Storage issues, Outdated drivers, A corrupted or damaged hard disk, viruses and many more casual problems.
To fix Kernel Security Check Failure error on Windows 10, you have to follow various methods as you don’t know exactly what is the main cause of the problem. But the good news is that the methods are quite simple and fast.
How to Fix Kernel Security Check Failure
Some major methods to Stop the hindrance caused by Kernel Security Check Failure are given below in a decent manner. It is recommended to follow these methods in the given order.
Method 1: Scan Your Computer
This is the first thing one should do if encounter Kernel Security Check Failure to find out any existing viruses and malware. For this Full System Scan, various programs are available like Windows Defender, Third-Party Antivirus, Bitdefender, etc. These are the best detectors and will easily detect all malware or virus that potentially sneaked into your computer.
Follow some simple steps to start the scanning process-
Step 1: To start anything first you need to launch the tool on your laptop and then double click on “Windows Defender”.
Step 2: Green arrow shows the Shield icon. Just select this.

Step 3: To full system scan you have to select “Advanced Scan” option.

Step 4: Launch Full System Malware Scan. Everything is done from your side.
After all these steps, check whether the tool is able to remove all detected malware and viruses. If not then download next antivirus to eliminate viruses. Last way to ensure that all viruses are eliminated is to Restore or reinstall your Operating System.
Method 2: Restore Operating System
As I said earlier if scanning does not work then try Restoring Operating System to fix blues of blue screen. Restoring will remove all newly installed applications on your PC. As cleaning the Operating System is very important especially when you are facing Kernel Security Check Failure error. For this, Windows 10 offers advanced recovery options.
Follow steps to Restore-
Step 1: Drive the cursor towards settings option and under this select “Update and Security”. Under the left side of the plane click on “Recovery”.
Step 2: Under Reset this PC I have marked “Get Started” option in the pic. Select this and then choose to Keep Your Files. If you do not wish to lose them.

Step 3: Major process is done now just follow the instructions given on the screen to fully complete this reset.
Method 3: Perform A Disk Check
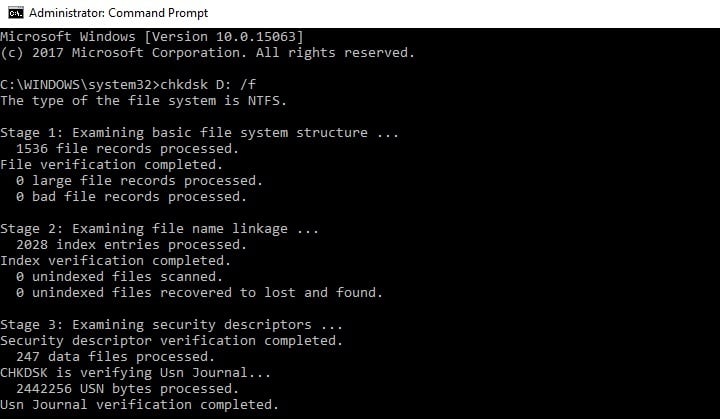
Procedure for running a disk check is simpler but at the same time, it is time-consuming. You can say that it might take 2 to 3 hours. So do not lose your cool while the process is taking place. It can be easily done on your Windows 10 using Command Prompt.
Follow these steps to scan disk-
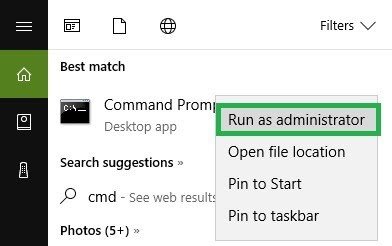
Step 1: Let’s start the process by selecting “Run as administrator” under Command Prompt.
Step 2: Then type chkdsk C: /f command on your keyboard followed by “Enter”.
Step 3: In continuation of the second step Replace C with the letter of hard drive partition.

Step 4: Most important point if you forgot to use /f then you will see one message on your PC “File needs to be fixed, but it does not fix any errors”. Hence, using /f is a must. Basically, /f parameter will detect issues and repair them.
Step 5: Now if you wish to repair physical problems then use /r command as well.

Method 4: Enable Legacy And Advanced Boot Menu
This method is a little bit long but is powerful. If the above ways do not work then try this one. There are more chances that the issue would be resolved.
It involves easy and ten straightforward steps which are given below-
Step 1: After starting your PC, carefully insert a Windows 10 bootable media into the optical media drive. This is not so complicated.
Step 2: One Windows setup box will be displayed on the screen. In that box select ” Next”.
Step 3: Now select the “Repair” option without wasting much time.
Step 4: Choose “Troubleshoot” option under “Choose an option” on your device’s screen. As shown below in the image.

Step 5: Under Troubleshoot you will find “Advanced Options”.

Step 6: After this choose ” Command Prompt” from all advanced options.

Step 7: Command Prompt will ask you to enter something that is “C” followed by “Enter” key.
Step 8: Here, to enable legacy advanced boot menu press Enter after typing the required command given [BCDEDIT /SET {DEFAULT} BOOTMENUPOLICY LEGACY]. All this you have to do on the C option.

Step 9: Command will start executing. Once the process is successful click on “EXIT” button to close the command prompt window.
Step 10: This is the last step in which you just have to check whether your computer is back at a normal position or not. Do it by selecting the “Continue” button under Choose an option similarly as in step 4 of this method.
Method 5: Procedure Of Memory Diagnostic
All the above 4 methods did not work out and you are still trying to figure out the problem. Use this last 100% beneficial method.
All steps are listed in a sorted way with proper image distribution-
Step 1: In the settings, you will find the Advanced Startup feature. Under this feature click on “See Advanced Repair Options”. Menu tab will open immediately and choose “Troubleshoot”.
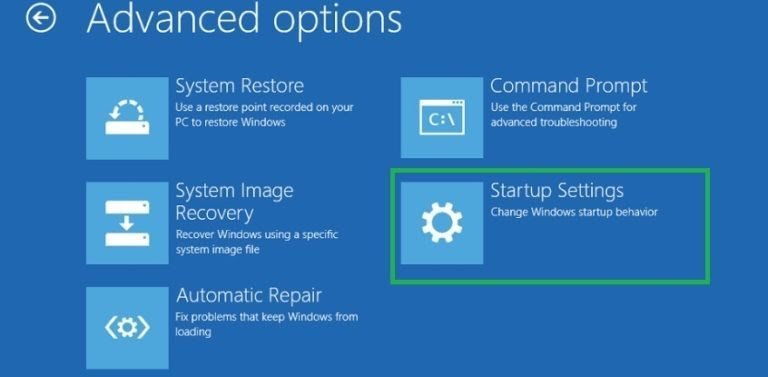
Step 2: As you can see under Advanced options “Startup Settings” is caged inside a green rectangular box. Choose exactly like this.

Step 3: Lower right side of the screen contains the Restart button. Tap on that button.
Step 4: Once computer booting got over then move your cursor to the upper right side of the screen and left-click on the “Search” option.
Step 5: First type cmd and then launch Command Prompt as an administrator.

Step 6: Type sfc /scannow command and bang in the “Enter” button.
Step 7: As soon as scanning completes type Exit to close the Command Prompt window.
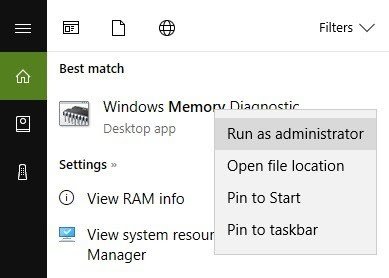
Step 8: Now again move the mouse over the upper right side of the screen and go to the search function for finding out memory option. Select “Windows Memory Diagnostic” option. The screen will look exactly like this.

Step 9: Now search for problems that exist in your computer. For this, choose “Restart Now” under Run as administrator.

Step 10: Last step is not for you but for the system because now after booting is over Operating System will automatically search for issues. All the problems will be clearly displayed on your screen. Like this, you can know what was the reason for Kernel Security Check Failure resulting in that Blue Screen Of Death Error.
Step 11: Restart your computer normally.
Conclusion
I hope that this article will bring a smile on your face as now you know several methods on how to deal with Kernel Security Check Failure. All these methods are well-tested by users. Choose the right one for you. I have tried to place a better picture before you.
