One of the common reasons for your PC slowing down is a large number of broken registry items that are present in the system. Although the size of each registry item is negligible, over time, there are hundreds of thousands of such entries created and stored. This can clog up memory and stop your PC from working smoothly.

In this guide, I’ll show you how to easily and safely remove any unwanted registry entries. Trust me, this is going to give you a significant improvement in your PC performance!
What Are Broken Registry Items?
The Windows Registry is a digital database that stores the settings for virtually everything on your PC. This includes application settings, user passwords, driver info, OS configurations, and more. Whenever you install a new program, a set of instructions for that program is created and added to the registry. These instructions and settings can then be interacted with by other programs to know where the files are located, which options to use in the program, etc.
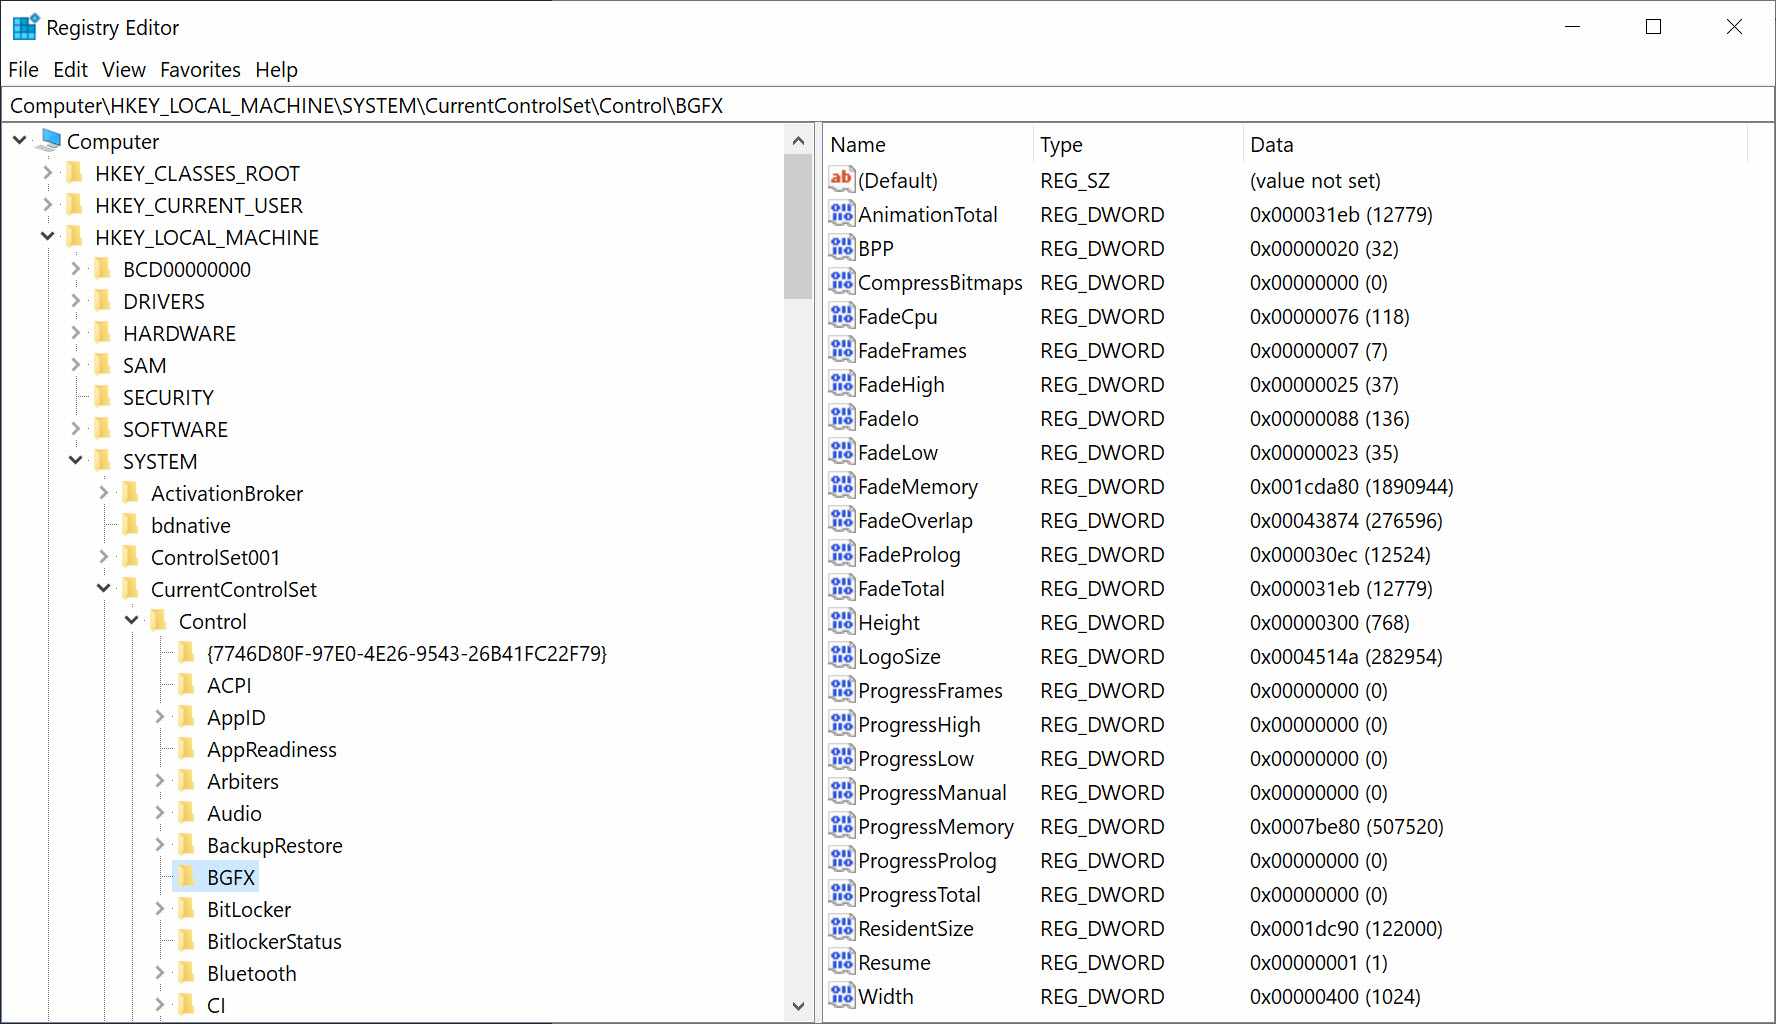
Whenever you uninstall or delete a program, the registry items are often left behind as residue. Sometimes, a failed installation, power outages, or system crashes can corrupt a registry file and render them unusable. All these are termed as ‘Broken Registry Items’.
Over the course of many years, you might have installed, uninstalled, reinstalled, and removed thousands of programs from your PC. The registry files of all these programs will take up your hard drive space, and you might never even know!
Why Should I Delete Broken Registry Items?
Too many broken, corrupt, and unwanted registry files on your PC can cause a dip in performance over a period of time. There are chances of error messages popping up, certain programs crashing, and even loss of system memory.

Here are some of the advantages of cleaning your Windows Registry.
- Makes Windows load faster.
- Prevents DLL Errors.
- Speeds Up Internet Connection.
- Remove invalid and malicious entries.
- Ensures smooth functioning of PC.
How Often Should I Clean Windows Registry?
If you’re someone who spends quite a bit of time on your PC, installing different programs and applications, it is advised to clean your Windows Registry once every 2 weeks. This will keep your system spick and span.
However, if you’re a light user who rarely installs too many programs, you can just clean your registry once in a month or two.
How To Fix Broken Registry Items
Now we come to the most important part of this guide. I’ll teach you exactly how you can clean your Windows Registry and remove all of those broken registry items in a safe and easy way.
But first, let’s make a backup for your Registry.
Create Registry Backup
This step is very important. If you make any mistakes while cleaning your Windows Registry (such as deleting a critical registry file), it can cause serious issues for your computer that are difficult to fix. Creating a backup will ensure that even if you do make a mistake, you can use the backup to restore your Registry back to its previous self.
Step 1: Press ‘Windows Key + R’ to open the Run tool. Type in ‘regedit’ and click ‘Enter’ to open the Windows Registry Editor.
Step 2: Click on the ‘File’ tab at the top and select ‘Export’.

Step 3: Navigate to your preferred location, give a name to the file, and click on ‘Save’ to create a backup copy of the Registry.
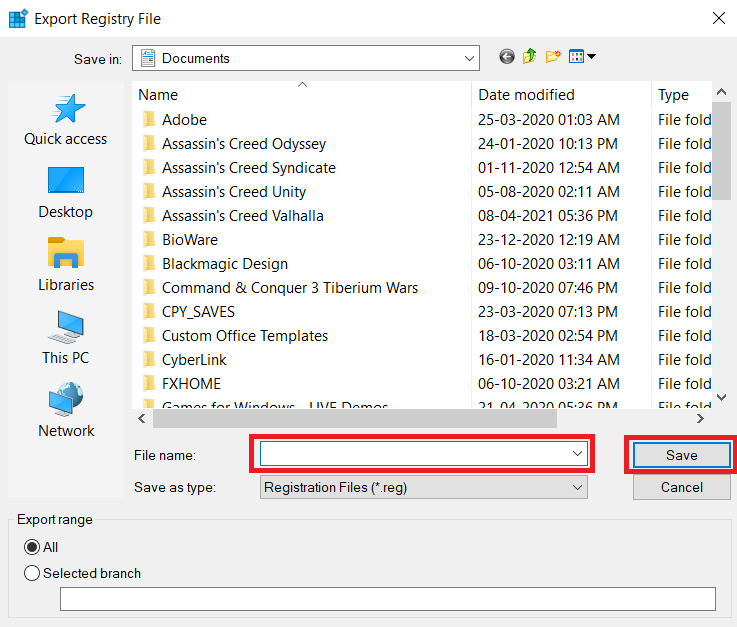
You can now proceed with cleaning the Registry. In case of any mistake, just open the Registry Editor, click on ‘Import’ (from the File tab), and import the saved backup file.
Method 1 – Use Windows Disk Cleanup Application
Windows has a utility tool called ‘Disk Cleanup’ that analyses your PC for unnecessary files and safely removes them. This includes broken registry files as well. I’ll show you how to use the Disk Cleanup tool.
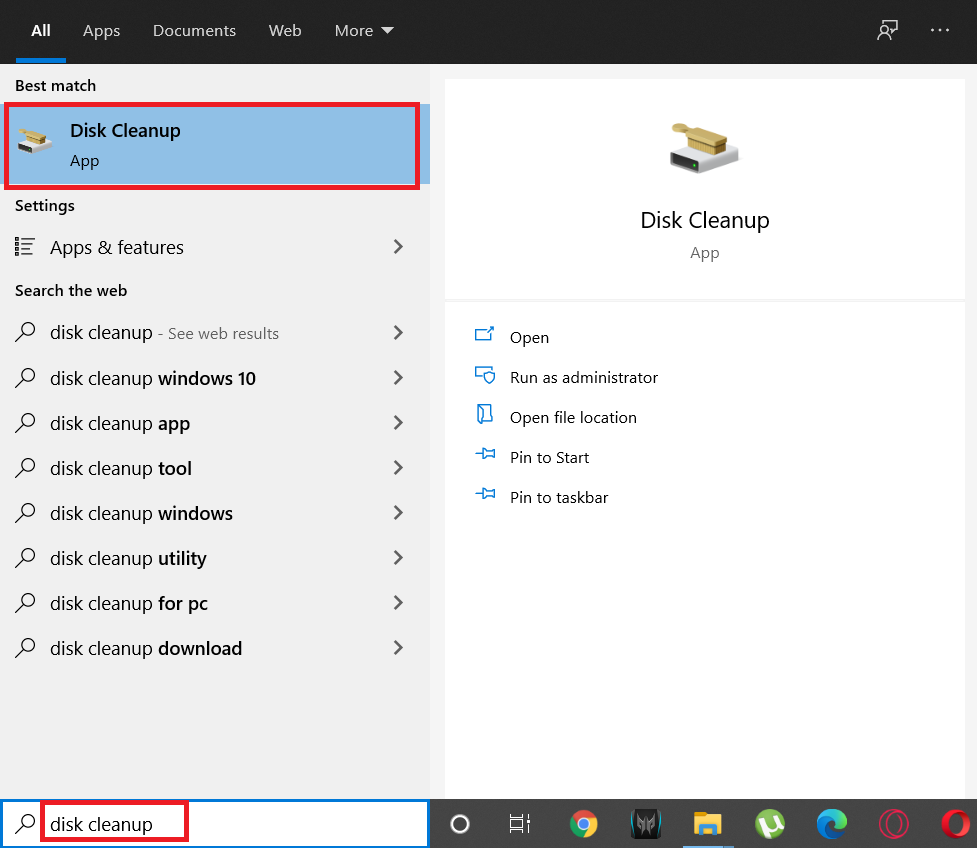
Step 1: Go to the Search option on your Taskbar and type in ‘Disk Cleanup’. Open the tool.
Step 2: Select the drive that you want to cleanup from the drop-down menu. I would advise to clean the C:/ drive first, and then any remaining drives.
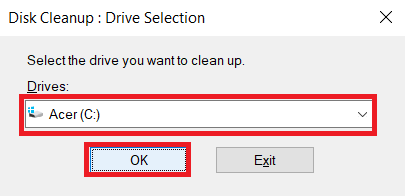
Step 3: Click on ‘OK’. Disk Cleanup will now analyze your PC and find all the unnecessary files. This will take just a few seconds.
Step 4: Under ‘Files to delete’, you can check all the boxes. If there are certain files you want to keep, uncheck them.

Step 5: Click on ‘OK’ to begin the Cleanup.
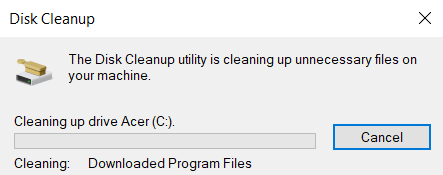
The utility will remove the selected files in a few minutes and free up PC space.
Method 2 – Running DISM Command
DISM stands for Deployment Image Servicing and Management. Windows comes inbuilt with this tool, and it can help repair and remove broken registry items. I’ll show you how to run the command for this operation.
Step 1: Click ‘Windows Key + R’ to open the Run tool. Type in ‘cmd’ and then press ‘Shift + Ctrl + Enter’. This will open the Command Prompt application with administrative privileges.
Step 2: Once the Command Prompt screen opens, type in the following command – ‘DISM /Online /Cleanup-Image /ScanHealth’.
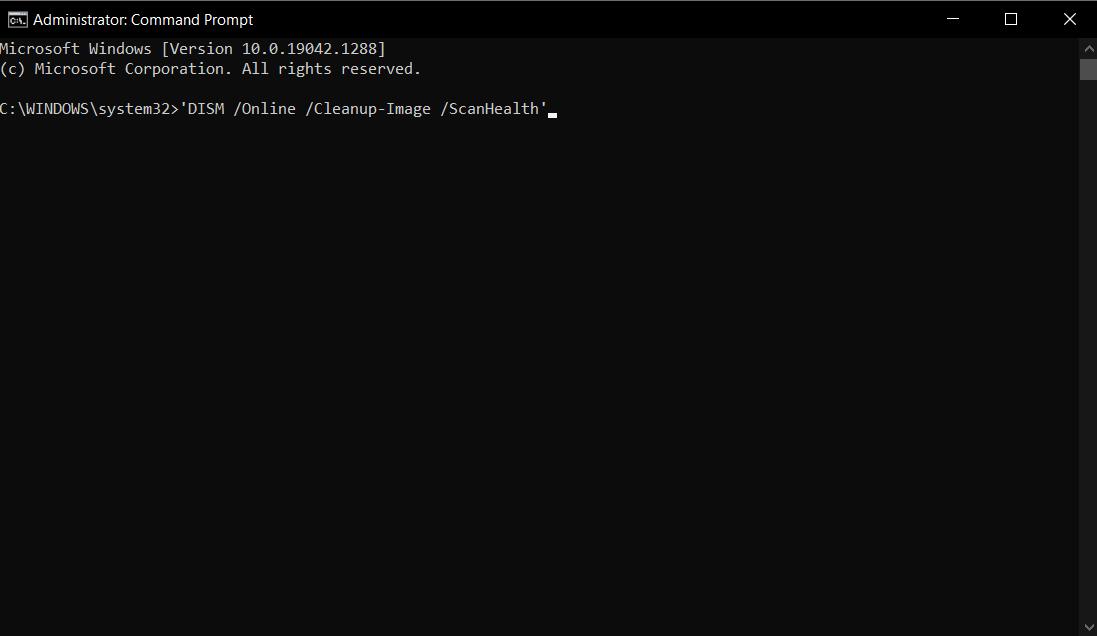
Step 3: Press Enter. CMD will now execute the command. It will take a few minutes to complete, and you will be able to see the progress within the CMD screen itself.
Once the process is completed, you can close CMD. If it’s been quite a while since you last cleaned your Registry, you’ll notice a significant improvement in performance right after this.
Conclusion
After following the methods in this guide, your PC performance will be quite smooth and you’ll also free up hard drive space. Think of your PC just like your house. Broken Registry items are like the dust that collects over time. Proper cleaning and maintenance are essential to improve PC health and keep it lasting for a long time.
Make sure you check out other helpful guides and articles on our website!
