Setting up the router can be a little difficult. From Linksys to Netgear and TP Link every router comes with its own complications. Not only initial set up, a lot of times the login process also demands our time. If you too have been stuck in such a situation, then we are here today to pull you out. In this article, we are sharing the complete guide to TP Link router and queries related to it like- TP-Link login, TP Link password change and so on. No matter you are looking for TP Link Wi-Fi router or TP Link modem router, you can get sorted for every issue.
But before we begin with the TP Link router set up, followed by TP-Link login process, let us know a little more about the key features of the router.
TP-Link Key Features
- Incredible Speed up to 300Mbps.
- Can handle several data streams simultaneously.
- Ensures smooth and stable network.
- It offers Multiple Security Protections aiming at absolute data privacy.
- Friendly with every IEEE 802.11g and IEEE 802.11b devices.
- Flexible Access Control feature easily establishes the controlled access policies.
- Quick Setup Wizard has detailed step by step instruction for Tplink Login and TP link router setup.
- Tplink routers are compatible with all the leading operating systems.
- Integral NAT and DHCP server.
- Has support for Access Control & Parental Control.
- Tplink router offers firmware upgrade & Web management.
How to Setup TP-Link Router?
To get your router started, follow the steps given below to set it up first. This is initial setup process, after which we will move on to the TP Link login, and what you can do if you have forgotten your TP Link login username and password.
Step 1: Connect your PC to the Internet before you begin with the installation process. Make sure that use connects your system through the broadband service.
Step 2: Now switch off everything, from your computer, DSL Modem/cable or your TP-Link router.
Step 3: Now place your router at an ideal place. An ideal location would be where it would be in no contact with direct sunlight or there is least amount of wires or metal interference.
Step 4: After placing the router in the middle of the wireless network, go ahead with the next step.
Step 5: There will be a web-based management page. Here you will have to log in to your TP-Link router.
Step 6: You can use the default web address of TP Link into the browser address bar. Type tplinkwifi.net into the bar.
Step 7: If this web address doesn’t work for you, then you can also make use of the default TP-Link login IP address of your router.

Step 8: Then provide the TP Link login username and password in the fields given. These input credentials are usually admin when you haven’t made any changes before.

So this is how you can easily set up your TP Link router. Now let us move on to the tplink login process.
How to Login to Tplink Router?
You can use this step-by-step guide for Tplink login. This will work for both your wireless devices and your system also.
Step 1: To begin with, for Tplink router login you will have to use the Web-based utility.
Step 2: Launch any web browser on your computer or any wireless device that you have.
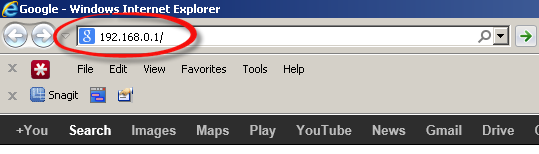
Step 3: Then in the web address, type the following default tplink router address– http://tplinklogin.net. Or you can also make use of the 192.168.0.1 as the IP address into the address bar.
In case none of these steps work, then check the web address or the TP-link 192.168 admin is used as the IP address or not.
Step 4: Soon you will observe a pop-up window. It is basically the Tplink login screen. You will have to fill in the TP-Link login default credentials as asked.

Step 5: After giving the correct credentials, you will be redirected to the TP Link router admin page. Now you can configure the further settings of the router.
So, a simple reminder to those who are new to TP Link router login, the default username and password is “admin.” And if you want to change it to something more personal, or funky, then we have an answer for that as well.
How to Change the TP Link Login Password?
If you are looking for a way for TP Link password change, then just follow the steps mentioned below.
Step 1: Open Google Chrome or Internet Explorer. Then type either of the following in the address bar- http://tplinklogin.net/ or 192.168.0.1.
Step 2: You will be prompted to enter the default credentials. Type “admin” as the username and in the password field.
Step 3: Now click on the Wireless option from the left-hand side menu present on the screen. And then select Wireless Settings from the submenu options.

Step 4: In the Wireless Settings window, the first field is Wireless Network Name. Change the name in this field and click on the Save option present at the bottom of the screen.

Step 5: Now to change the password, select Wireless Security from the submenu of the Wireless option present on the left side.

Step 6: Now under the WPA/WPA2 field, you will find the Wireless Password option. Change the password accordingly from admin to anything that you want.
Step 7: Click on “Save” option to apply the changes. But that is not enough for applying the changes.
Step 8: You will have to reboot your system in order to apply the changes. So in the same TP link window, click on System Tools option. And from the submenu, click on Reboot option and finally in the main panel. Click on Reboot button.
That’s it. You are ready to go online. Make sure that all your connected devices are updated and now you can use the new password that you had set to connect your various wireless devices. We hope that this guide was helpful in understanding TP Link router and TP Link login process. If you have any query do share it with us in the comments section.