Every one of us usually makes use of the PrtScrn button on the keyboard of the desktop or laptop to take a screenshot of the currently opened window to share it online with other. However, all the Windows OS designed after Vista comes with an amazing feature that enables the users to take all the complex screenshots with ease and it is named as Snipping Tool. It is the built-in Print Screen application for Windows which allows the users to take screenshots, edit and even annotate them online with ease. Taking any screenshot has become faster and easier after the advent of Snipping Tool.
Also Read:
What is Snipping tool?
Snipping Tool is the new Windows Application that enables users to capture screens and edit screenshots with ease without third party apps. It is developed and integrated by Windows in all their operating systems after Vista. All modern day operating systems including Windows 7/8/10 are equipped with this screenshot capturing application. Before moving ahead to learn the ultimate use of Snipping Tool, lets first discuss what are the settings that you need to do in the application for ultimate use of it.

How to Open and Use Snipping Tool in Windows
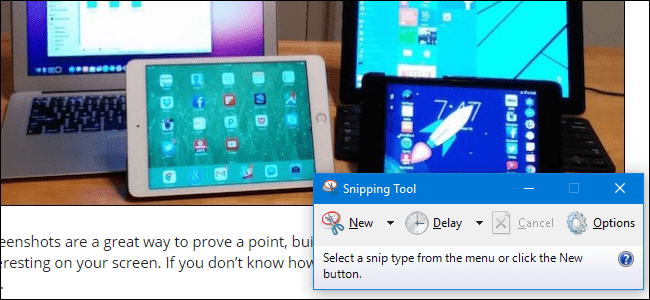
Firstly you need to open the Snipping Tool on your Windows PC by typing “Snipping Tool” in the search bar and hit enter. You will get the windows as shown below.
The Snipping Tool window will open once you click on the tab of Snipping Tool from the search list. The window will have many basic features like taking a new screenshot, taking a delayed screenshot, canceling screenshot and more. You need to make few adjustments and change the settings before using Snipping Tool for capturing screens.

Click on the “Options” button as shown below. The options menu will let you specify how the application looks like and behave

In the Application section, you will find the settings where you need to make the necessary changes as given below.
Also check:
Always Copy Snips to Clipboard: You need to check the box so that all the screenshots captured can be transferred to the clipboard, thereby allowing the users to paste the images into other application with ease including image editors and word processors. 
Include URL Below Snips – This option is marked because when you take screenshots with URL, it will save the files as Single File HTML or MHT docs. If you take a screenshot from Internet Explorer, then it will save the screenshot along with the URL of the webpage.

- Prompt to Save Snips Before Exiting – This is the option which you need to check because when the tool is closed, the application lets the users save the screenshot which they have not already saved
- Show Screen Overlay When Snipping Tool is Active – You also need to choose this option as it will allow you to see the white overlay display on areas that will be captured by the tool. If you don’t want to see the overlay of the screenshot before capturing then turn off this option
Below is the section from where you need to choose the color option. From this setting you need to change colors including:
- Ink Color: You can change and set the color of the ink as per your needs. You can also change the border of the display from where and also the color of the drop-down menu
- Show Selection Ink After Snip is Captured: If you Tick this option then the selected border will show around the snip after it has been captured by using the ink color that you have chosen
Finally, click “Apply” or “OK” to return to the Snipping Tool main window. Now you are all set to capture screens using the snipping tool.

How to Take Screenshots with Snipping Tool in Windows
-
Taking Basic Screenshot using Snipping Tool
In a bid to take a basic screenshot with the help of Snipping Tool in Windows, you need to take the cursor to the right corner of the Snipping Tool and click the “New” option.

You will see four options from the “New” button:
- Free-Form Snip – This is the first option in the menu which enables you to draw any shape with the pointer of the mouse and then take a screenshot of that selected area
- Rectangular Snip – This is the option that enables you to draw a rectangle with the mouse pointer and then take a screenshot of that rectangular area
- Window Snip – This is an option that lets you click any open window to screenshot of that particularly visible part of the window. This option only let you capture the screen that is visible, and rest will go off-screen
Full-Screen Snip – This is the last option in the menu that lets you capture the entire display or the screen. If you have multiple monitors attached to one system, then all the screens will be captured with the Snipping Tool.

PS: When the menu is open you will see a black dot next to all these options and this translates the default type of screenshot the tool will take if you click on the “New” button instead of opening the drop-down menu. The selection will remain default unless you change it before using the tool next time for taking screenshots.

If you have selected any option from the menu and suddenly changed your mind, you may click “Cancel” to return to the Snipping Tool Window.
-
Taking Delayed Screenshot With Snipping Tool
The Snipping Tool window also has a “Delay” button which you need to click if you want to take a delayed screenshot with this tool. Upon clicking the “Delay” button, you will come across with a number between 0 and 5 which represents the time which the tool will take to capture a new screenshot. This option is mainly selected when you need time to open the actual window for which you want to capture the screenshot.

PS: This option also has the same default choice, and if you don’t select the time by placing the dot on the specific time, it will work as selected default.

How to Store Captured Images with Snipping Tool
Once you are done with the screenshot capturing using Snipping Tool, it is the time to open the editing window. The Snipping Tool has the editor tool built-in which allows you to edit and annotate the screenshot. In the toolbar, you will see many new options. There is the “New” and “Delay” button which you need to ignore while editing. If you click any of this button you will be redirected to the Snipping Tool main window for capturing a new screenshot.

- After capturing the screenshot click the “Save” button to save the captured image to the disk and the “Copy” button is available to copy the image to the clipboard, instead of saving it and the “Email” button is there to draft a new mail with the image as attachment that you have captured using Snipping Tool.
- You will also see some of the annotation tools at the right of the window. The Pen Tool allows the users to draw images in diverse ink colors. So, if you select the “Pen” icon, you can start drawing whatever image you like. To change the color of the pen, you may click the drop-down menu and select the color of your choice.
- There is a “Highlighter” option available which you may click to highlight the portion of the screenshot with a thick, yellow and transparent color. Here there is no choice in color which you change for the highlighter.

- Finally, there is the “Eraser” button which is used to erase the annotations that you have made the image. The tool is different from other erasers that you find with any editing tool as it allows you to erase the entire annotations, instead of allowing you to remove a part or portion of the captured images or annotations. So, be careful while using the “Eraser” tool of the application as it removes everything instead of removing a part of the annotations within the image.
Thanks for reading this article.