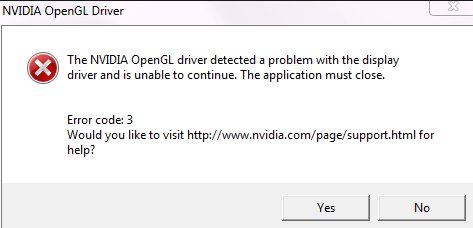
Most of the Windows 10 user complaints that they are facing the Nvidia driver crashing windows 10 when they are playing games or watching movies. Because of this the computer starts lagging, and this is a very frustrating problem.
It lags of 5-10 minutes, which is not good and disturbs the mood of the user. We have come with some different methods which will help you solve the error.
If you are using NVIDIA Graphic Card then you have to use NVIDIA . But many users have reported NVIDIA driver keeps crashing issue.
NVIDIA Driver Crashing in Windows 10
Users are facing Display freeze or stuck for a few minutes, pc crashes when installing Nvidia drivers and Nvidia freezing windows 10 issue. The possible reason can be corrupted or outdated drivers.
The primary reason for the Nvidia driver crashing problem can be the incompatible driver. The new Windows 10 update comes with many new features. So your old drivers cannot run with a new Windows update.

Method 1: Manually update the Driver
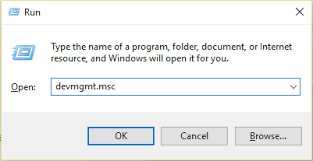
Step 1: First of all, you have to open the Device Adapter by press Windows Key and R both the keys together, and after that, you have to type devmgmt.msc and then press the Enter button.
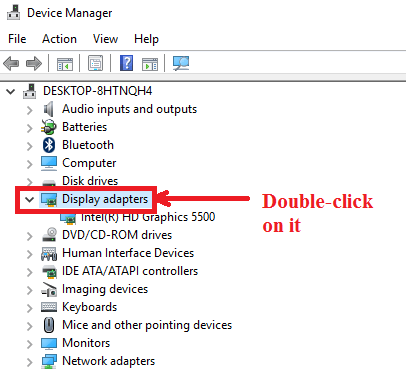
Step 2: Now you have to expand to the Display Adapter on the Device Manager and then right-click on the Nvidia Graphic card, and from there you have to enable it.
Step 3: After enabling your Graphics Card again, you have to the right click on the graphic card and then select the Update Driver Software.

Step 4: Now on the next page, you will see the Search automatically for updated driver software option click on it and wait for the process until it finishes.
Step 5: If from the above steps the issue is solved, then it will be good. But if it does not then continue.
Step 6: Now again you have to click on the Update driver software. But this time in the next window you have to select this option Browse my computer for driver software.
Step 7: Now just select the device from the list of Nvidia Graphic Card which is compatible with your device then click on the Next button.
Step 8: Now just wait for the process is completed and after finishing the process Restart your computer and your issue of Nvidia drivers crashing windows 10 will be solved.
Method 2: Altering Power Management Functions
Sometimes what happens that with the hi-end graphic processor the power of the system starts consuming too much, and because of this you may start facing the issue.
If any issue is coming due to the power management, then follow the below steps:
Step 1: Same as the above method you have to press the Windows Key and the R both the keys together and in the box you have to type Control Panel and then press Enter.

Step 2: Now you have to select the Small Icon option from the top right corner and after that, select the Power Options.

Step 3: Now, the list of Additional Power Plans will appear in front of you. Here you have to modify from the current plan to High performance.
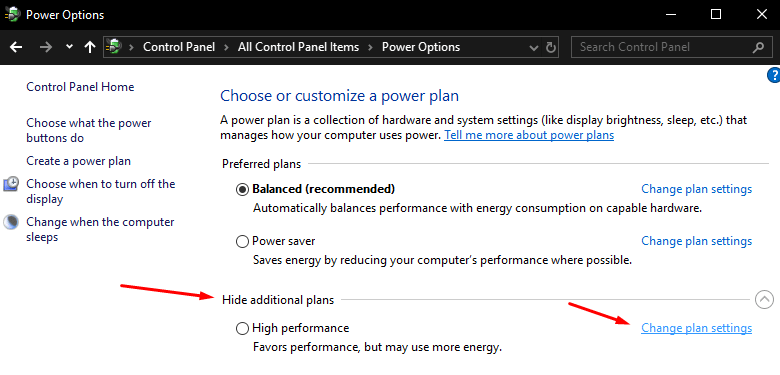
Step 4: Now select the Change Plan Setting as shown in the below image.
Step 5: After doing this, you have to select the Change Advanced power settings.
Step 6: Now expand PCI Express & choose Link State Power Management.
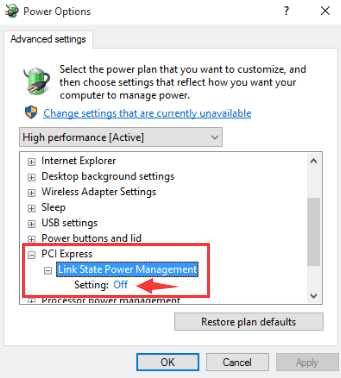
Step 7: Make sure that the setting is Off.
Method 3: Select Prefer Maximum Performance
Step 1: First of all, you have to right-click on the Desktop and from there select the NVIDIA Control panel option.

Step 2: After selecting it to click on Manage 3D settings.

Step 3: Select Power Management Mode to Prefer Maximum Performance. Now click on Apply and save settings.
If you have any doubt regarding any method or step then comment down below, we will try to help you.
