You might be well aware of software called Twitch. It provides you with the facility to record the live videos, or in better words, it is a live streaming video platform. Twitch is one of the best ways to try luck in live streaming. This is because it features an astonishing source of broadcasting. But when you overplay Twitch, it sometimes fiddles with its settings. And to use this software professionally right encoding settings are a must. And for this the right bitrate, resolution, and frame rate for your streams is important. That’s where you require the need for encoding software like OBS comes in. In this article, you will learn the best OBS settings for Twitch that will make it work efficiently.
By applying the Settings given in this article, you can easily stream on Twitch with no Lag and that too at high FPS and HD Quality. Let’s begin.
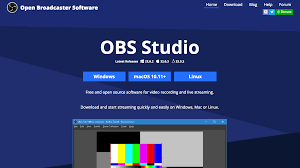
What Is OBS?
OBS means which is an encoding software program used for live streaming videos. It acts as a supporter for Twitch for any online video platform used to stream videos needs a software. Since it is an encoder it encodes the videos in the desired format so that it can be used for streaming. Using this, it will ensure that viewers get high-quality content. And this is achieved when you have the best OBS stream settings. OBS is considered as the best Broadcaster Software for it supports the wide range of platforms such as Mac, Windows, or Linux.

OBS fetches some great features that are suitable for beginners as well. You get several video streaming options like custom transitions, correction tools, and different filters on audio and video, blending, and more.
How to Use OBS Studio for Twitch?
To start with OBS Studio software, you need to first set up the software and then stream on Twitch. Follow the steps to do so-
Step 1- Download the OBS Studio software on your device from the .
Step 2- Follow the on-screen instructions. Do this to install it on your computer.
Step 3- From the list of Streaming Services, select Twitch.
Step 4- Go and open your Twitch TV dashboard.
Step 5- Then go to Settings. Then to Stream Key and finally Show Key.
Step 6- Enter the Stream Key into the Stream Key box. You will see the Broadcast Settings menu.
Step 7- Lastly click on Apply.
Once you are done with setting up of the OBS Studio for Twitch, you will now have to configure the live stream layout to initiate the stream. This can be done by adding the game source, webcam, images, or text. Now click on Start Streaming on the OBS Studio’s main window. And you are done.
Best OBS settings for Twitch Streaming and Recording
Not all settings work best for Twitch and hence some settings are preferred over others like high frame rate of 60fps. But one must know the best OBS settings for Twitch using OBS encoder.

OBS Video Capture Settings
To set the video capture settings you need to go to the video section. There you will find fields you need to adjust for the best video capturing or recording.

The first section is the Base (Canvas) Resolution which is the resolution of your screen. You can set the resolution that you want like small or significant or enter it manually.
The second is the Output (Scaled) Resolution section, and it is the resolution of the recorded video. For high-quality video set it to 1920*1080 and for a normal video, 1280*720.
Go to Downscale Filter to apply the filter for downscaling. For the recorded videos, the best is to apply Lanzos, and for live streaming, select other available options.
For common FPS Values (frames-per-second) set as 30 frames per second, but you can experiment with others and set the required value.
Best OBS Video Output Settings
The best output settings are necessary for the ultimate quality of the video. So go to its advanced section and find the best setting adjustment.

The first option is Output mode that you need to select it as Advanced from the dropdown list. Once you have done that, you will find three tabs as Streaming, Recording, and Audio.
First go to Recording tab, for setting up the path where you want your videos to be saved.
Next, format and set it to MP4
Then go to the Encoder section and use stream encoder and just leave all other options as it is.
Best OBS Studio Streaming Settings for Screen Recording
First, go to the section that is Streaming. Here you will see the fields like Bitrate and CPU usage which is needed to edit. Make the Bitrate section to 12000 and the CPU usage to ultrafast. Finally, select the x264 encoder field.

There are other settings also that you can apply for professional experience.
Full HD High Frame Rate (FPS)
Here are OBS Settings for Twitch Streaming 1080p at 60fps
- Framerate – 50 or 60 fps
- Resolution – 1080p
- Keyframe interval – 2 seconds
- AVC (h.264) Profile – Main/High
- AVC (h.264) Level – 2
With these technical specs, you should have a bitrate of 4,500 to 6,000 kbps.
SD High Framerate
- Framerate – 50 or 60 fps
- Resolution – 480p
- Keyframe Interval – 2 seconds
- AVC (h.264) Profile – Main/High
- AVC (h.264) Level – 3.1
You should have a bitrate of 1500 to 3000 kbps with these technical specs.
Low Bandwidth Ingest
- Framerate – 20 or 25 fps
- Resolution – 240, 360 or 480p
- Keyframe Interval – 6 to 10 seconds
- AVC (h.264) Profile – Main/High
- AVC (h.264) Level – 3.0
The best bitrate for a low bandwidth should be 400 to 1200 kbps. Ideally, you should aim for ingest of 1,000 kbps or less.
Conclusion
Well, all the sections mentioned here are quite necessary to get better changes in your recordings with OBS Studio. So you can always experiment and tweak other settings as well and make most out of it to ensure fluid streaming. Or else you can simply follow this guide for the best OBS settings for Twitch Streaming.