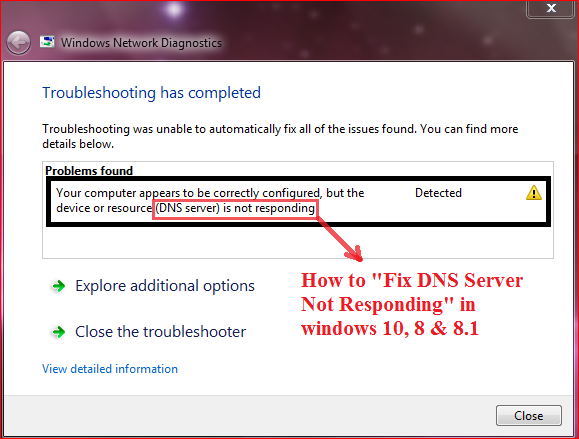
DNS Server Not Responding error is among the most concerned problems for the users in the Windows ecosystem. Errors relating to DNS server occurs due to inappropriate functionality to the user command or failure to the user and system interaction.
What a DNS server does with your computer is, it converts domain names into IP address so that computer can understand it. The failure of this task leads unable to show the website you attempt to visit.
Reasons for DNS Server Not Responding Error
The basic reason for DNS server not responding is due to failure of the server to convert domain names into IP address. Well, the interruption in translating the domain name into an IP address may occur due to several causes and they are as follows.
- Failure of communication between computer browser and DNS server.
- Due to server down.
- Windows Firewall blocked in communication between the DNS server and a particular website.
- Corruption of computer virus.

How to Fix DNS Server Not Responding
These are the common reasons for DNS Server Not Responding Error. To fix the problem on your Windows 8, 8.1, or 10, you may apply any of the methods we are guiding here.
The methods to fix this Windows error vary and are applied according to its root causes. So Let’s start off with the basic ones.
Method 1: Try Alternative Device or Restart Power Cycle
In case you are using a Router, try to connect other devices to the Router just to check if the problem is within the device or in the Router. If the net is not working properly with other devices as well, there is a huge chance that the Router is the cause of DNS server error. In this case, restarting the Power Cycle is a common solution.
But, if you find no problem with your Router, you may skip this method and try out the other solutions.
- Switch off your Router.
- Unplug the device Power cable.
- Now, wait for a few moments, maybe a minute.
- Connect back the cable to the device.
- Turn on the Router and check if everything fine.
Method 2: Clearing Browser Cache or Update Browser (Chrome)
We already have mentioned that failure of communication between the computer browser and DNS server may occur the error. Sometimes, overwhelming browser cache and cookies may interrupt in the usual functionality of the browser. On the other hand, an outdated browser may also fail to respond to the DNS server appropriately. In these cases, you have to clear the browsing cache and update the browser if required.
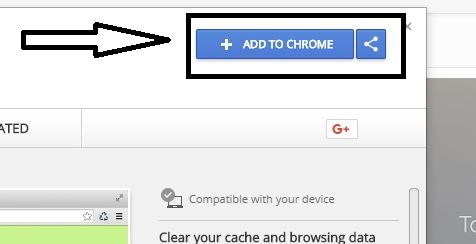
Step 1: Click to to your Chrome.
Step 2: Click on “ADD TO CHROME” button.
Step 3: Now, hit the “Add Extension” button.
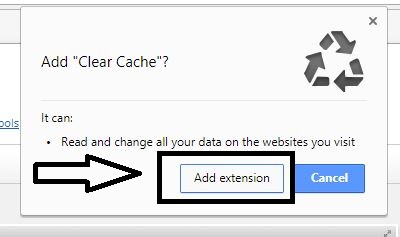
Once this extension is active in your browser, you can simply click on its icon located in the top-right corner of the browser and clear the caches in single-click anytime. You may also clear browser
You may also clear browser caches manually. Follow the below steps.
Step 1: Click the browser Menu icon and then navigate to More Tools > Clear Browsing data (CTRL+SIFT+DEL).
Step 2: On the popped up page, tick to the checkbox for “Cookies and other site data”, “Cached images and files”, “Download history”(optional) and “Browsing history” (optional).
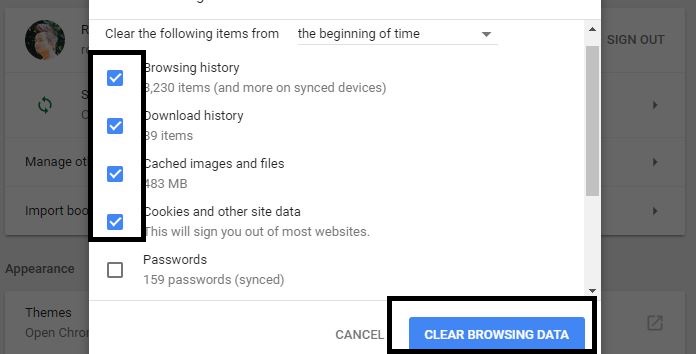
Step 3: Now, hit the “CLEAR BROWSING DATA” button.
In your Chrome browser, if you see the menu icon in colors like Green, Orange, and Red, it means the update is pending for 2, 4, and 7 days respectively. If the dotted icon is black, the browser is up to date.
To update the Chrome browser –
- Click the menu icon at the top-right corner.
- Click on the “Update Google Chrome” option. (If this option is not available, the browser is already up to date)
- Now, click the “Relaunch” button.
Method 3: Disable Your Windows Firewall
Sometimes, when you try to visit a certain website, DNS Server not responding issue occurs due to Windows Firewall. The Firewall is designed to protect your system. In many cases, if the Firewall suspects any website, it blocks the server. But, it can be misleading as well. So, disabling your Windows Firewall is one of the solutions to DNS Server error.
Step 1: Open Control Panel and then click on the System and Security option.

Step 2: Click on the Windows Firewall followed by Turn Windows on or off to the left.

Step 3: Check to Turn off Windows Firewall (not recommended) the option for both private and public networks.
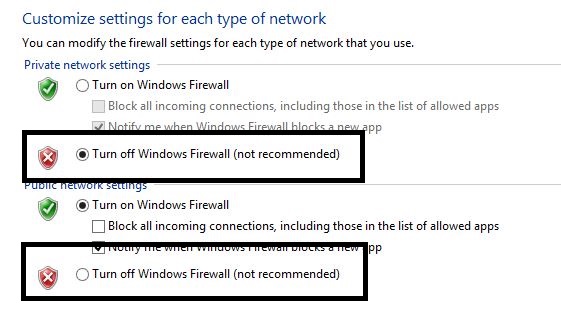
If this method does not work, you may try the rest.
Method 4: Customise DNS Server Address
Your computer system tends to obtain a DNS server address automatically. Under any circumstances, if the existing DNS address does not work anymore or any sort of changes occurs in it, DNS Server Not Responding error is liable to occur. To fix this, you will need to customize the DNS Server address manually.
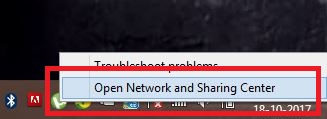
Step 1: Right-click on the network icon on your toolbar and then click Open Network and Sharing Center.
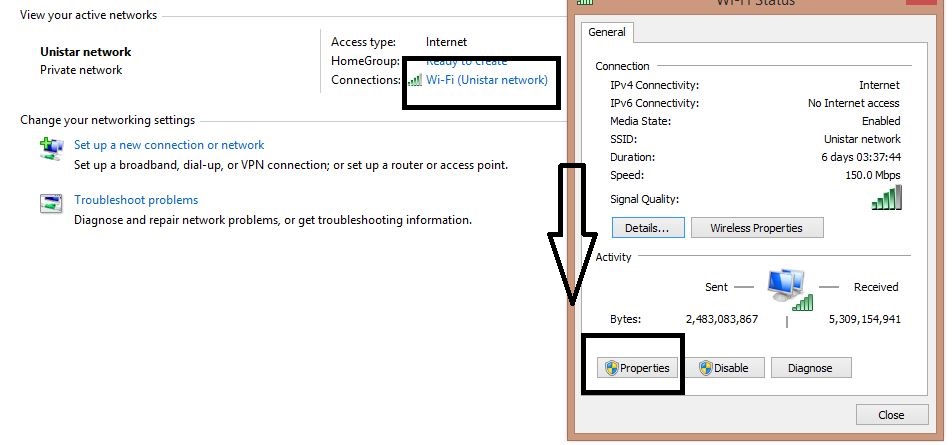
Step 2: Click on a connected network (local or private). A pop window will show up, then click Properties.
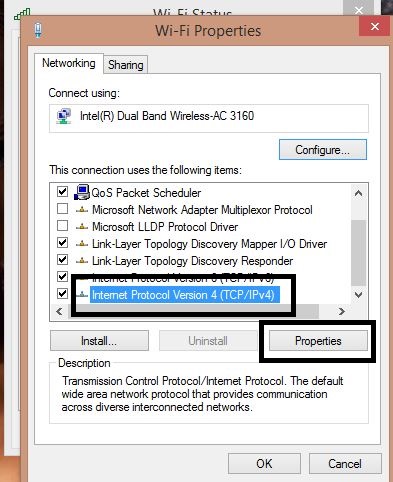
Step 3: On another popped window, Tick Internet Protocol Version 4 (TCP/IPv4) and then hit Properties button again.
Step 4: Enable the Use the following DNS server addresses and then enter the below DNS server addresses in their respective places.
- Preferred DNS server: 8 8 8 8
- Alternate DNS server: 8 8 4 4

Step 5: Tick the Validate settings upon exit option and then hit OK.
These are the methods you may try out in order to fix the DNS server not responding to the problem on your Windows 8, 8.1, and 10. Not to forget, restart your system after executing the methods 3 and 4. This will make sure the changes made to apply successfully.
I hope you have fixed your problem with the DNS server using these techniques. We will help you out with further issues regarding the DNS server. So, stay updated.
