In recent times, I have been hearing a lot about a common issue from Windows users. This forced me to take this case seriously because obviously, we can not see you struggling like this. Firstly, I researched a lot about this Critical Process Died error and now I have figured out enough ways to handle this problem. So, I am going to discuss my experiences with you guys along with ways to Fix Critical Process Died error on Windows 10, 8 and 7.

Okay, so this is how your Windows screen looks like when you encounter unwanted Critical Process Died error with 0x000000EF error code. This interruption literally makes us feel died. But you know what this is really a very common BSOD problem over Windows Operating System. Here, BSOD means Blue Screen of Death. Almost all of us face this issue due to various reasons.
Real Reasons Of Critical Process Died Error
Before running for solutions let me tell you that error is not the main issue. Real culprits are always hidden, sounds filmy but it is true. You need to try several methods to catch the real problem and after fixing that issue your Critical Process Died will also get solved.
Therefore, the major reasons behind this issue are-
- The error can come after upgrade in Operating System.
- After installation of any new program.
- When the user wakes up their laptops and computers after sleep.
- If the user login by typing username and password then within 30 seconds BSOD appears.
- The critical system corrupts while gaming.
- Can also occur at the time of booting process.
Many more simple problems also result in a blue screen like memory problems, bad driver, etc. This failure affects all models including Surface Pro 4 devices. Now let us jump on solutions to end this annoyance.
Methods To Rectify Critical Process Died
These methods are quite simple and yes no need to apply any Rocket science. I would rather say that even a child could solve it by following steps in an ordered manner.
Solution 1: Perform A Full System Antivirus Scan
I recommend it to do it first. Just to confirm if the error is because of the virus who has somehow managed to sneak into your device potentially. It is not necessary that the virus needs to be strong to infect your device even adware is capable of bringing the Critical Process Died.
Go along with these steps to reach the destination-
Step 1: To run a full system scan go to start button and then double click on “Windows Defender”. This step will launch the tool in your device.
Step 2: As you can see the shield icon on the left side of the screen. Right-click on that icon.
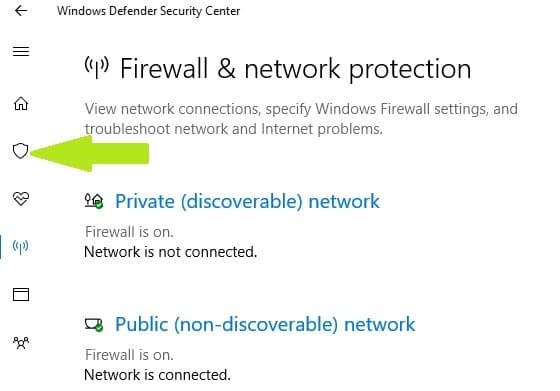
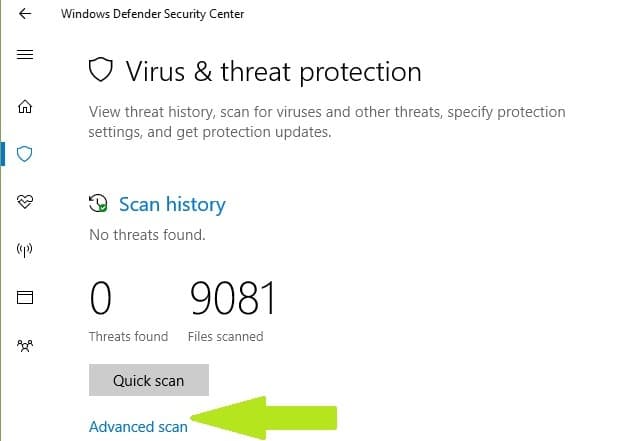
Step 3: Select the Advanced Scan feature.
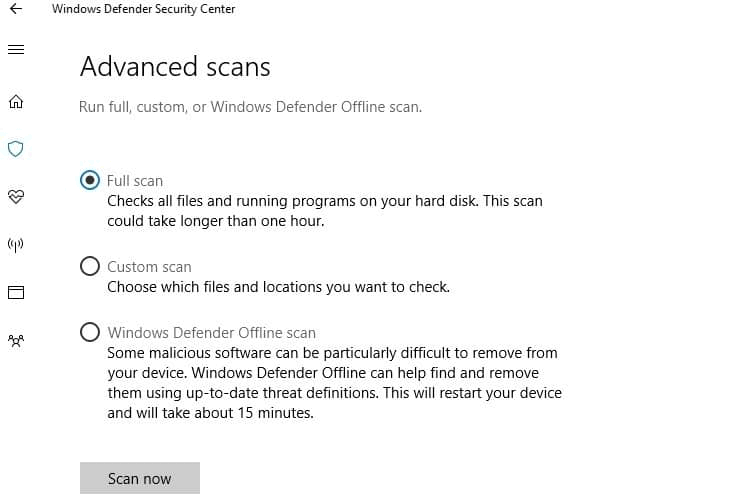
Step 4: Launch the full system malware scan and for this roll up your eyes to search for Full Scan option.
Try using some third-party antivirus programs like Bitdefender, Malwarebytes, Panda, etc. These all are best for virus removal from your Windows PC.
Solution 2: Make Sure To Clean Boot Your PC
Booting helps to clean all the junk from your computers. You can use a minimal set of drivers and startup programs to rectify this error as it may be the cause of Critical Process Died. This will remove the software conflict that occurs when we install a new program or update the OS.
Follow steps to boot your device-
Step 1: Type and search for system configuration.
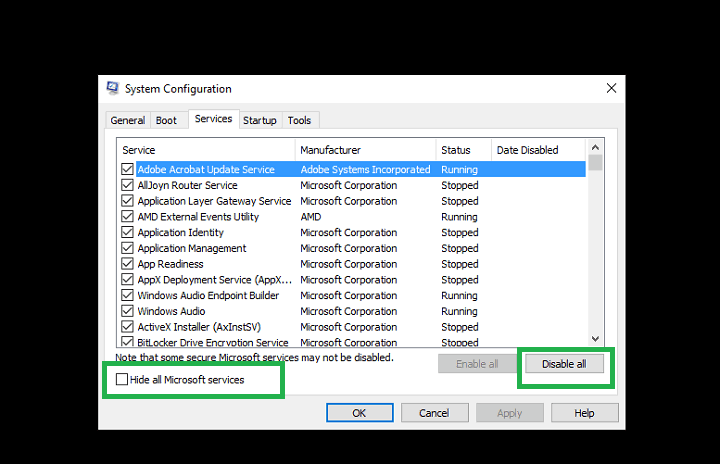
Step 2: Under Services tab choose to Hide All Microsoft Services box as shown and next is to click on “Disable all”.
Step 3: Open the Startup menu and click on the Open Task Manager. Under this choose Select all items and click Disable at the bottom right corner of the screen.
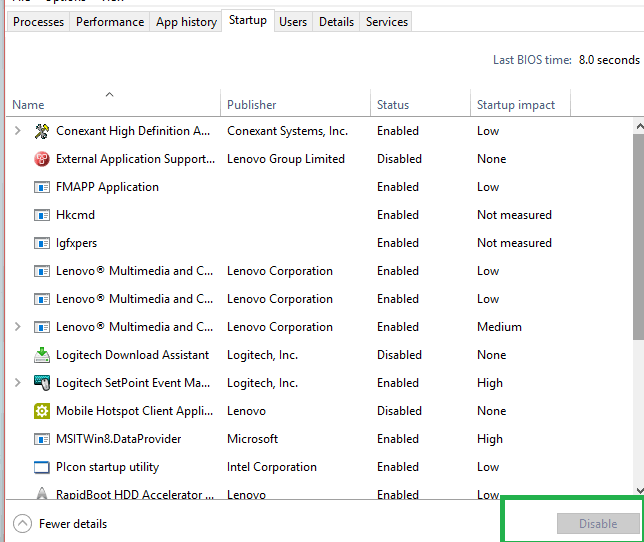
Step 4: After closing the previous Window now on the startup tab of the System Configuration dialog box hit OK and get ready to restart your computer normally.
Solution 3: Uninstall Newly Launched Updates
It is observed that the Critical Process Died actually occurs most of the time because of updates. We can not stop updating also as Windows 10 is all about updating and off course all want to use the latest version. But still, if some updates are bringing more harm than good then it’s better to delete them.
So here are the steps to follow-
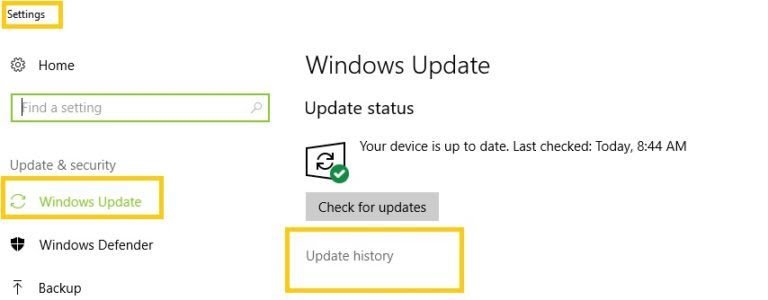
Step 1: First of all take yourself to the settings and then Windows Update. After selecting “Upgrade History” feature roll your eyes to scan full history.
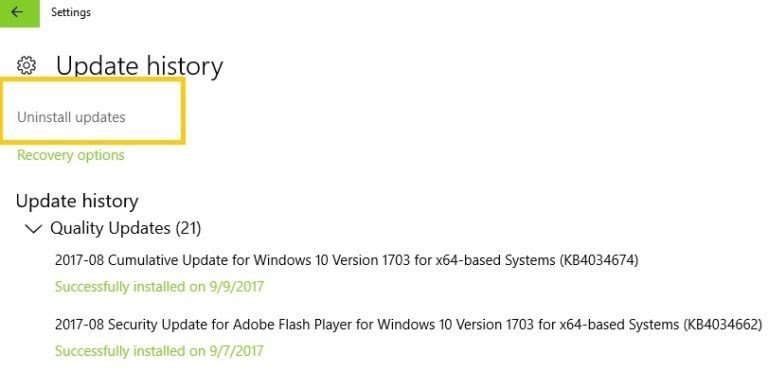
Step 2: Now quickly move the cursor towards “Uninstall Updates”.
Step 3: Navigate through all the updates and select those which you want to delete and then click “Uninstall” to end the trouble.

Method 4: Perform an SFC Scan
One should try this method before launching the antivirus method as there are good chances that issue might be resolved by doing an SFC scan only. It basically repairs the corrupted system files. It is very helpful and also the most cliché type of solution in these BSOD errors like Critical Process Died.
Steps are given below to run an SFC scan-
Step 1: Select Command Prompt as an administrator and to find this right-click on the Start menu.
Step 2: As shown in the image type the following command sfc/scannow.
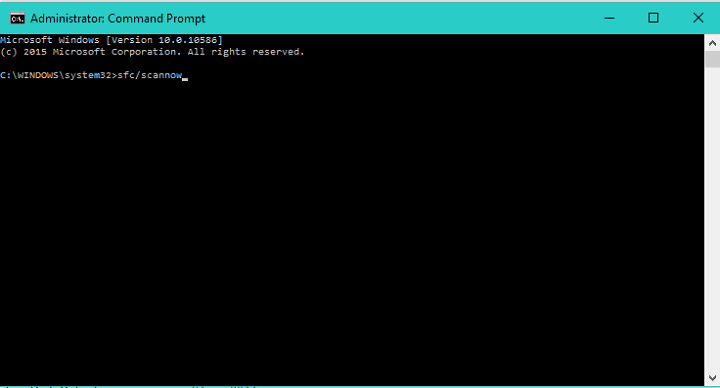
Step 3: Scanning process will last for only 2 to 3 minutes till then wait.
Step 4: When the process gets completed then Restart your PC to check if the error still persists or not.
Solution 5: Restore Your System
Restore tool helps a lot in shifting your PC to its back state. However, you can not use it unless you have enabled the creation of restore points before BSOD issues starts occurring.
Follow a few steps to Restore-
Step 1: Run towards the settings box.
Step 2: Here you will find many options to select “Update and Security”.
Step 3: After the second step click on “Recovery” option.
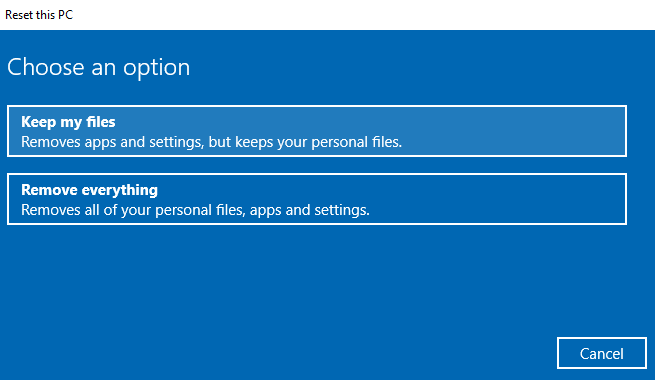
Step 4: On the next window choose Reset this PC.
Step 5: Start the process by clicking on the Get Started and yes don’t forget to choose to keep files. Follow whatever system instructs you to do.
Conclusion
You reached the end of this article. I will be happy if these methods helped you in rectifying this critical situation of Critical Process Died issue. I’m sure that not all but at least one of them will definitely help you. Methods were all written in the simplest way and images were also attached for necessary steps to make this even more helpful.
