Remote Desktop is an amazing software that allows you to control another computer through a remote connection. However, many users have reported that they’ve been getting this error message – ‘Remote Desktop Can’t Connect To The Remote Computer For One Of These Reasons’.

If you’ve received this error and want to know how to fix it, I’ll show you how to do so in this guide. I’ll also help you understand why this error occurs so that you can prevent it in the future. Let’s begin, shall we?
Why Do I Get ‘Remote Desktop Can’t Connect To The Remote Computer For One Of These Reasons’ Error?
Here are some of the major reasons that can cause the ‘Remote Desktop Can’t Connect To The Remote Computer For One Of These Reasons’ Error.

1. Unstable Internet Connection
A poor or unstable internet connection will cause the remote connection to fail, and this particular error message will pop-up.
2. Mismatch in login credentials
While connecting to a remote desktop, you will be asked to enter the security key. If the security key is entered incorrectly, the connection will be terminated immediately to prevent unauthorized access.
3. Antivirus Restrictions – Main Reason For ‘Remote Desktop Can’t Connect To The Remote Computer For One Of These Reasons’ Error
Some antivirus software would block Remote Desktop capabilities due to security concerns. Disabling the antivirus temporarily would resolve the issue in this case.
4. Using Public Network
If you’re connected to a public network, Windows might prevent you from using Remote Desktop feature, also due to security reasons. Always make sure you’re on a private, secure network before attempting a remote connection.
5. RDP not working after Windows Update
If you’ve recently updated your Windows OS, the update might interfere with the RDP functionality, and give you a number of errors.
How To Fix ‘Remote Desktop Can’t Connect To The Remote Computer For One Of These Reasons’ Error
These are some of the easiest fixes for getting your Remote Desktop software back in working order. These solutions have worked for the majority of the users, so hopefully they work for you too!
1. Allow Remote Desktop Connections – Best Fix For ‘Remote Desktop Can’t Connect To The Remote Computer For One Of These Reasons’ Error
It goes without saying that Remote Desktop functionality has to be enabled in Windows for it to work in the first place. Although this is enabled by default, in some computers it might be turned off. I’ll show you how to enable it.
Step 1: Go to the Search function in your Taskbar and type in ‘allow remote connections to this computer’. Click on the first option (the one with the logo of a wrench and screwdriver).

Step 2: Find the option called ‘Change Settings to allow remote connections to this computer’. Click on the ‘Show settings’ option right next to it.
Step 3: Check the box for ‘Allow Remote Assistance Connections to this Computer’. Tap on ‘Apply’.
You have now successfully enabled Remote Desktop Connections. See if you’re able to use it now.
2. Add The IP Address Of The Remote Computer To Host File
If the remote computer you’re trying to connect to does not have its IP Address stored in your host files, you’ll face issues while using the Remote Desktop feature. Here’s how to add it.
Step 1: Click ‘Windows Key + R’ to open the Run dialog. Type in ‘cmd’ and click ‘Ctrl + Shift + Enter’ to open Command Prompt with administrator privileges.
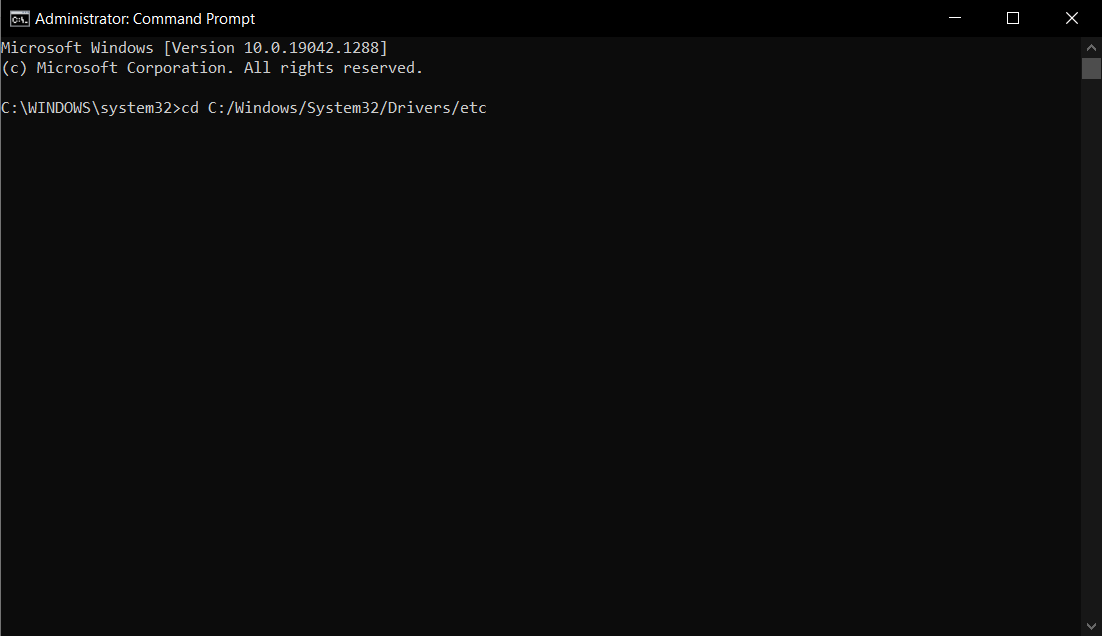
Step 2: Type in the following command – ‘cd C:/Windows/System32/Drivers/etc’. Hit ‘Enter’.
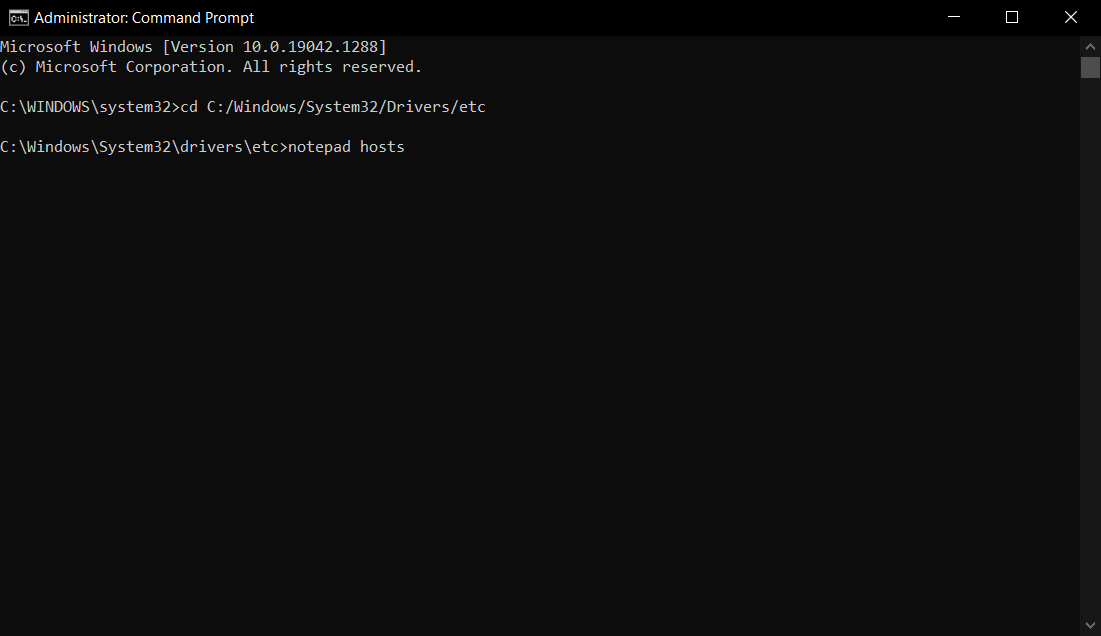
Step 3: Now type in the next command – ‘notepad hosts’. Hit ‘Enter’.
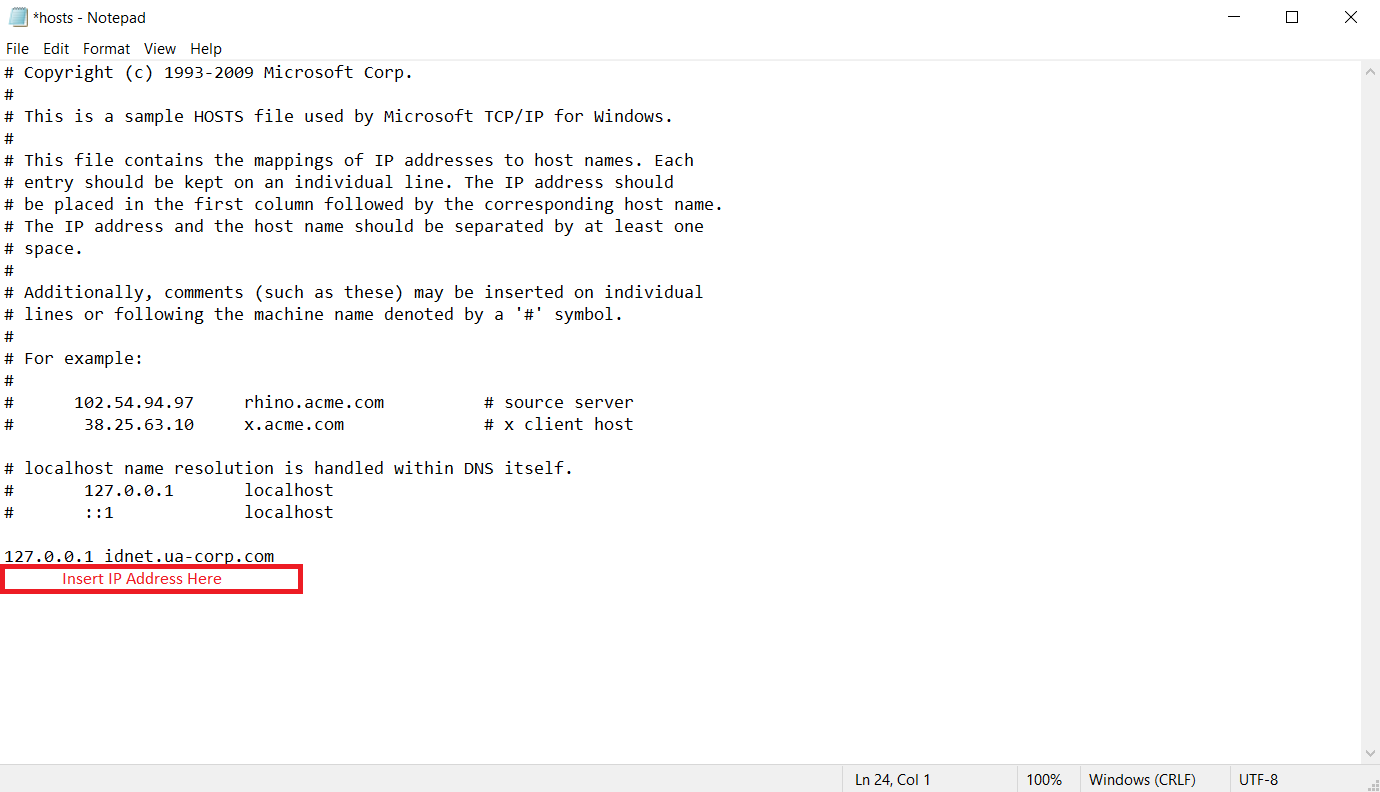
Step 4: You will now see the host file notepad open up. Add the IP Address of the remote computer at the end of the file. Save the notepad and close it.
You can now check to see if the error is resolved.
3. Change Your Firewall Settings
Firewalls often block incoming and outgoing remote connections due to security reasons. This can cause ‘Remote Desktop Can’t Connect To The Remote Computer For One Of These Reasons’ Error. So, if you have a strict firewall policy set up, you should attempt this fix.
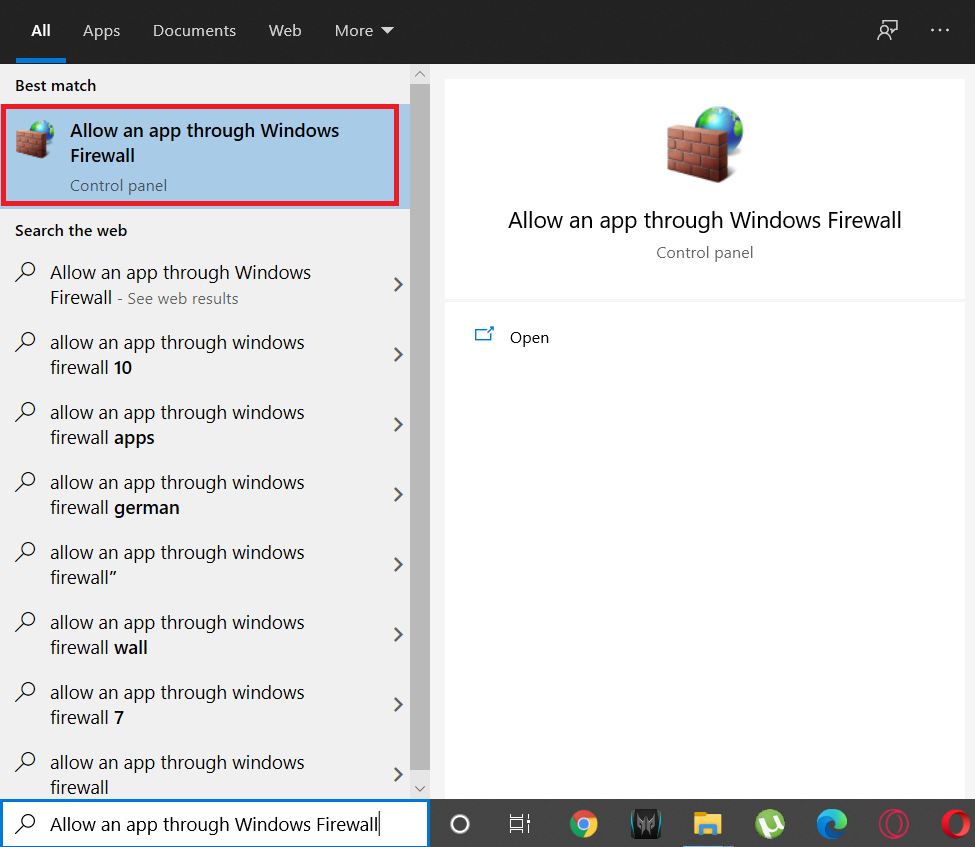
Step 1: Go to the Search function on your Taskbar and type in ‘Allow an app through Windows Firewall’. Click on the first option.
Step 2: On the top right corner, you’ll see an option called ‘Change settings’ (With a shield icon). Tap on it.
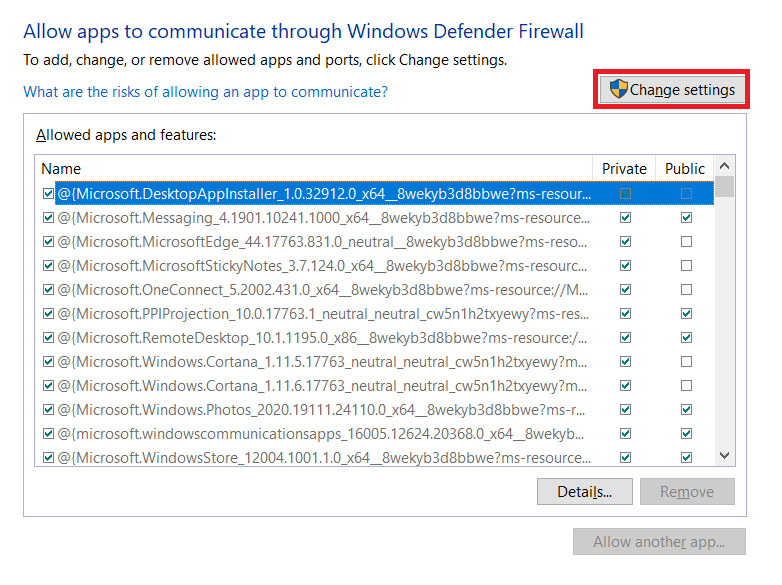
Step 3: Scroll down till you find ‘Remote Desktop’ and check the box for ‘Private’.
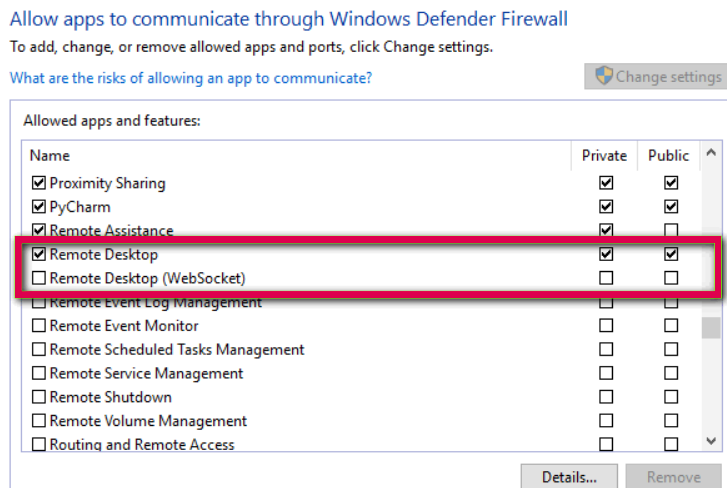
Close the settings window and restart the Remote Desktop software. Try to see if it working as expected.
4. Add The RDGClientTransport Key
This fix relies on a registry edit to fix the Remote Desktop error. I’ll show you how to create a new DWORD key in the Windows Registry which will force the RDP to use RPC/HTTP connections instead of HTTP/UDP. Here are the steps.
Note – Always create a backup of the Registry files before proceeding with any Registry changes.
Step 1: Press ‘Windows Key + R’ to open the Run dialog. Type in ‘regedit’ and hit ‘Enter’. This will open the Registry Editor.
Step 2: Navigate to the following directory – HKEY_CURRENT_USER/Software/Microsoft/Terminal Server Client.
Step 3: Right-click on the empty space on the right pane and click on New > DWORD (32-bit). Name it ‘RDGClientTransport’.
Step 4: Double-click this key to open its ‘Properties’.
Step 5: You’ll see an option for ‘Set value data’. Make it ‘1’. You can now click ‘OK’.
Close the Registry Editor. Your Remote Desktop should now work properly.
Conclusion
After applying all these methods, you will not be facing the ‘Remote Desktop Can’t Connect To The Remote Computer For One Of These Reasons’ error. However, if you still get the same error message, immediately get in touch with Microsoft Support () so that they can check if there’s any other issue with your Windows OS.
Let us know if you have any other queries in the comments below!
