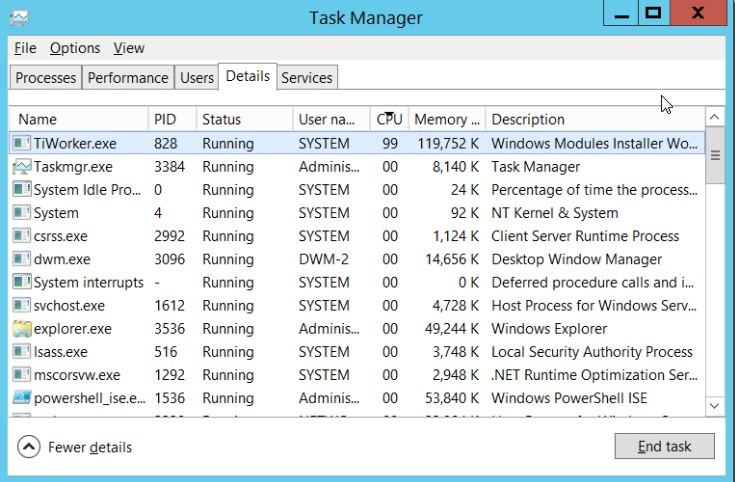
TiWorker.exe Windows Modules Installer Worker is a process that is actually related to Windows Update. This TiWorker error usually occurs after running the update of Windows. Several times you might have noticed TiWorker.exe is causing usage issues on your CPU.
This TiWorker exe Windows 10 error is generally common in Windows 8 and Windows 10. Basically, the TiWorker.exe Installer Worker is an essential process for the Windows Update service and it operates every time when Windows startup during power-on of the computer.
But the error related to TiWorker.exe Windows 10 makes your system completely unusable. Therefore it is needed to fix this TiWorker.exe Windows Modules Installer Worker error as soon as possible. Well, no need to worry if you have come across such type of error here are the methods to resolve it.
What is TiWorker.exe Windows 10?
Normally TiWorker exe Windows runs in the background at the time when the system is checking for new Updates available and simultaneously releases the resources of your system when the Update is finally completed. When Update is failed the error occurs in the CPU. And this becomes the main reason for Windows modules installer worker high CPU usage in Windows 10.
Fix TiWorker.exe High Disk Usage Problems
Since many try to remove this error by installing a new TiWorker.exe. This, in turn, uses your CPU and puts a load on it. In some cases, it may happen that TiWorkerexe may hover CPU up to 100% usage which in turn causes the bad performance of your system.
So let’s now encounter that when you come across such kind of Windows modules installer worker Windows 10 error how can you fix it using various methods.

Method 1 – Scan your System for Viruses
Viruses or other kinds of malicious programs are responsible for causing TiWorker.exe high CPU/Disk usage issues. Therefore before you go for troubleshooting the TiWorker.exe Windows modules installer worker in Windows 10 you can first need to perform malware Scan to check and remove if any kind of viruses detected on your computer.
Method 2 – Check for available Windows Updates
Now if you want to fix the TiWorker.exe High usage error make sure every Update is installed.
Step 1: Go to the start menu and then open settings.

Step 2: Click on Updates and Security.

Step 3: Now, Click the option check for Updates.

Step 4: Then install all the Updates and reboot your system.

Method 3 – Run Troubleshooter and System Maintenance
This solution automatically fixes the problem of High usage CPU
Step 1: Press Windows key + x to open the following menu. From that select Control Panel

Step 2: Now set the “view by” option to Small icons from the left top corner.

Step 3: Then open Troubleshooting and click on View all option.


Step 4: Find System Maintenance from the list and double-click on it.

Step 5: Then the following window pops up, click on Next button.
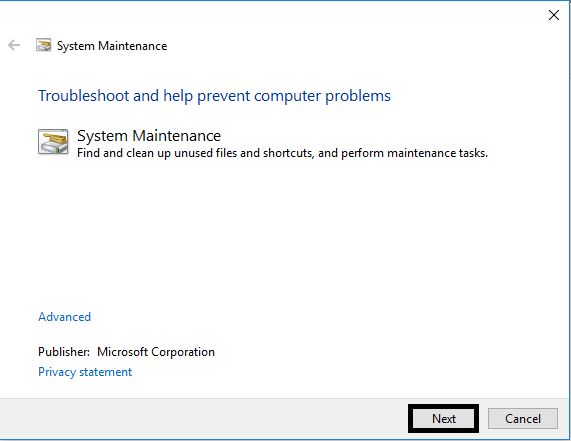
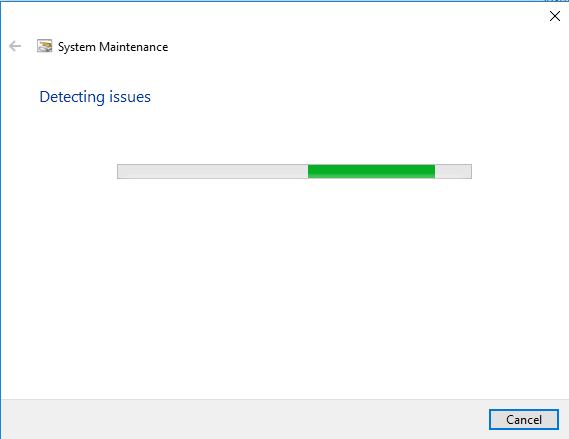
Step 6: Now, the windows will detect problems.
Step 7: After detecting it will show you the following window, then choose “Try Troubleshooting as an administrator”.

Step 8: Now, it will again detect to find any errors as an administrator. After detecting completely in case there are no errors then it will show as below or else it will ask you to install some updates. In that case, you need to follow some on-screen instructions to install these updates.
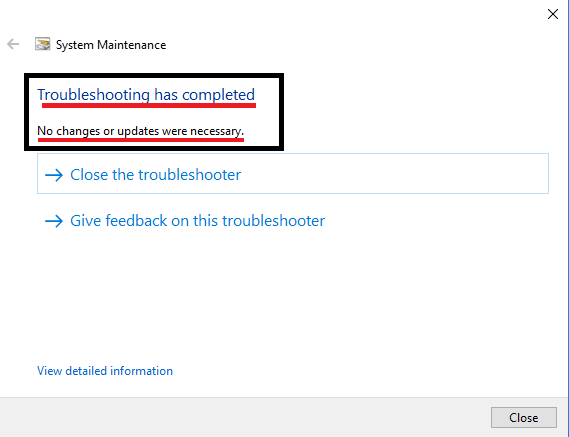
Step 9: Once when the system maintenance is completed from the list, select the Windows Update utility.
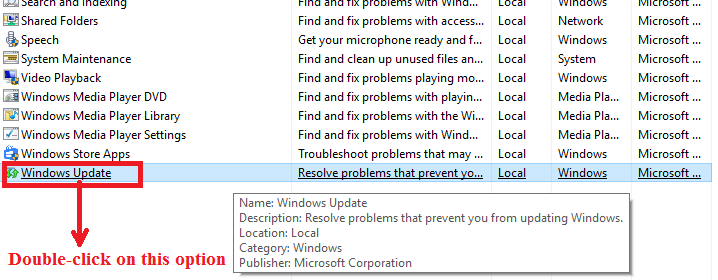
Step 10: Then again press Next and follow the onscreen prompt so as to troubleshoot and fix the Windows Update problem.

Method 4 – Delete the Software Distribution folder
The WindowsUpdate has its software folder called a Software distribution folder and in this, all the downloaded Updates of Windows are located. If that folder is corrupted then the problem arises with WindowsUpdate. So to fix the issue you need to delete all the Updates and force Windows to create again a new and empty Software distribution folder. The steps followed can be:
Step 1: To open the Run command box, simultaneously press Windows Key + R.
Step 2: In the run command box type services.msc and then hit enter.

Step 3: Then a window appears like below from the list select “windows update” and right click it to stop the service.

Step 4: Navigate to folder C:/Windows.
Step 5: Delete the old software distribution folder.

Step 6: Restart your system. When you will restart the computer Windows will automatically create a new distribution folder to restore all the Windows Updates.
Also Read:
Method 5 – Decrease TiWorker process priority
Another method to fix this TiWorker.exe Windows 10 high CPU usage issue is by decreasing the priority of the TiWorker process-
Step 1: Press Ctrl+Shift+Esc buttons at a time to open Task Manager.
Step 2: In the Task Manager window, go to the Details tab.

Step 3: Find the Tiworker.exe from the list and right-click on it. Then select set priority and tap on “Low” option to decrease the priority.
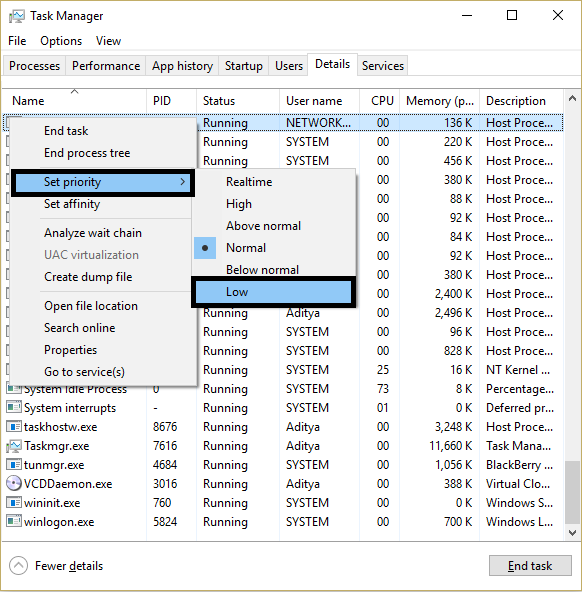
So with this temporary solution, you can decrease the high CPU usage of your system.
Method 6 – Fix Corrupted System Services
To fix this issue you need to run a System file checker or SFC tool that will let you fix the corrupted files of Windows.
Step 1: From the Start menu, search for Command Prompt. Perform right-click on the Command prompt option to run as Administrator.

Step 2: In the Command Window, you need to type the command as SFC /SCANNOW (in capital letters).

Step 3: By the time SFC tool checks and fixes your corrupted Windows files and services; you should not use your computer that whole time.
Step 4: When SFC tool has finished running then reboot your computer ( Hold the power button for 5-10 seconds and the device will be automatically turned off )
Method 7 – Fix TiWorker.exe issue with DISM tool (System Update Readiness Tool)
Step 1: Firstly click on the Start button and then again go to Command Prompt Window.
Step 2: In the command prompt Windows, you need to type the command and then hit enter. The command is followed as-
Dism.exe /Online /Cleanup-Image /Restorehealth

Step 3: Wait till the time DISM repairs the component store.

Step 4: When the operation will get completed the Window will appear showing that component store corruption was repaired successfully.

Step 5: Then close the command window and restart your computer.
Method 8 – Clear Cache Updates
Another way in which you can resolve TiWorker.exe High CPU issue is by clearing the WindowsUpdate cache. Then reboot your computer and check for all available Updates manually once again.
Follow the below steps to Clear Cache Updates:
Step 1: Open Notepad and Copy the below lines of code.
net stop wuauserv
CD %Windir%
CD SoftwareDistribution
DEL /F /S /Q Download
net start wuauserv
Step 2: Save the notepad file with this name Erase_Cache.bat file on the desktop.


Step 3: Now Right-click on the Erase_cache.bat file and run as administrator.
That’s all! By doing this you successfully cleared the cache updates.
Method 9 – Turn off Updates for Windows 10
This method may also work to bring back your PC in normal conditions. All you need to do is turn off all the Updates available for Windows 10. This can be done as follows-
Step 1: Press Windows + r to open run command.
Step 2: In Run window type services.msc and hit the OK button.

Step 3: Then scroll down to search for Windows modules installer and double click on it.

Step 4: In General tab, Find Option named “Startup type” then you will notice a drop-down menu from that select Disabled Option

Step 5: In the Same Tab find Service Status option (you can see that option in the above figure also) and Hit Stop and then click on OK.
So after trying any one of the methods mentioned above, you will easily be able to fix the TiWorker.exe Windows 10 high CPU usage problem to run your system back in the normal condition.
Remember TiWorker exe Windows modules installer worker is very important for Windows Update services, therefore, any issue related to doing should be resolved as soon as possible.
You can try the above methods as they are very easy to follow and can be done with no efforts in less time. Good Luck guys!
