It is very important to have complete knowledge of your computer system. Eighter you are a gamer or coder, you have to make sure that your system has enough RAM to process code or play a game. Here in this article, we are going to share how you Check How Much RAM You Have on Windows PC or Laptops.
RAM is an abbreviation of Random Access Memory, a type of memory that can be accessed randomly and is volatile by nature. Two primary types of RAM are available in the market:
- DRAM (Dynamic Random Access Memory)
- SRAM (Static Random Access Memory)
When a person operates a computer, there is a multitude of questions that one thinks of, especially how can I check my processor and RAM window 10? It is generally known that the more RAM a computer has, the faster it operates. Do numerous individuals wonder how to Check How Much Ram You Have? The answer can be acquired by following the steps outlined below; a person can obtain complete information regarding the RAM.
- Check the RAM through msinfo32.exe
- Check the RAM through the Task Manager
- Check the RAM from the Control Panel

METHOD 1: CHECK the RAM through msinfo32.exe
Microsoft has an inbuilt tool known as the Microsoft system information (msinfo32.exe), which provides complete details regarding the computer’s RAM capacity. The process to operate msinfo32.exe is as follows:
- Select the window’s logo and the R key together, after which a dialogue box “Run” will appear on the screen.
- Type msinfo32.exe in the blank field and click on the “OK” button.
- A dropdown menu will appear, and the RAM can be seen in the “installed Physical Memory” from the dropdown list.

Through this, you can quickly check how much RAM you have in your Windows.
METHOD 2: Check the RAM from the task manager
The task manager incorporates in-depth insights on ways for checking the RAM in Windows 10; however, there are a few steps to follow:
- Press the “Ctrl,” “Shift,” and “Esc” keys altogether. This will result in opening the task manager dialogue box.
- Click on the “Performance” tab after selecting ‘Memory.’

- You can snow access the complete information regarding the memory storage and how much RAM is available in your Windows 10.
METHOD 3: Check the RAM through the control panel
Every computer incorporates the control panel feature where people can go through information related to the computer’s RAM and detect issues in Windows 10. Following are the simple steps for knowing how to check the RAM speed on the Windows:
Also Read:
- Open the startup menu of the computer and type “Control Panel” in the search bar.
- Click on the Control Panel to open it.
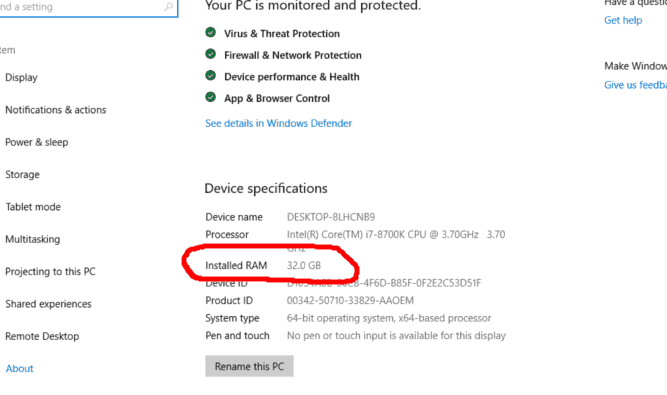
- Search for RAM and click on the “View Amount of RAM and processor speed.”

- You can check all the information related to the RAM in the “Installed Memory” feature from the “System” section.
RAM usage on Windows 10
It’s very normal to face problems while utilizing your PC due to high RAM usage on your Windows 10. This further leads to a notification that outlines “Your Computer has low memory”. Shutting down the computer might help a bit, but this is not the solution to the primary storage issue. Users can find a permanent solution by following simple methods that require them to right-click the taskbar and select “Task Manager.” After doing so, the memory usage can be seen in the “Processes” section.
How to check the RAM for problems
It’s essential to know the right tools for checking the RAM in Windows and preventing issues that can cause harm to your Data. The tools provided by Microsoft include:
- Windows memory diagnostic
- Run Memtest86
Windows memory diagnostic
This is considered to be the adequate method for checking the RAM in your Windows and can be accessed through the following steps:
- Open the start menu, type in “Window Memory Diagnostic” and press Enter.

- It can be accessed by the keyboard or the short cut key: window key+R.
- A dialogue box will appear on the screen where you will have to input “mdsched.exe” and press enter.
- You’re required to restart the PC for completing this task adequately and will not be permitted to perform many functions on the computer.
- Tap on the “Restart now and check the problem.” After which a screen will appear that highlights Window Memory Diagnostic and enables the computer to perform its task.
- You can see the status bar that notifies if any problem has been detected. Your PC will restart automatically once the computer finishes its work.
Run MEMTEST86
MEMTEST86 is the most powerful technique that’s employed for checking the RAM along with its speed and spacing issues. This tool further incorporates a premium paid version that is quite effective. Both of these versions are bootable and require you to run the .exe file with the downloads and provide an extra USB drive. This will create a bootable drive and restart the computer.
This procedure will boot up automatically and will update the owner with the status if any problem has been detected. Press the “Esc” button to exit and restart the computer. In case any issue is detected while the computer is booting, it’s possible that the RAM is not a good fit for the computer, and you need to change it.
How to check the RAM manufacturer
If an individual wish to know insights regarding the manufacturer of the RAM, the following steps will assist them:
- Click on the startup and input “Command Prompt.”
- Right-click and choose “Run Administrator.” and type ” wmic memory-chip get device locator, manufacturer.” This will display the RAM’s manufacturer, its brand, and its model on your screen once you select to enter.
How To Find Computer Specs By Window 10
Computer specs are the basics of a computer which everyone should be familiar with. A handful of ways for finding computer specs can be discussed below:
Computer Specs by system properties
The information system can be accessed through the window system if an individual requires to get familiar with a few of the computer’s basics. It can also be accessed by the keyboard’s sort key: press the window button, and “Pause/Break” at the same moment. A screen will appear that contains the primary insights related to the computer.
Computer specs by system information
You can check the computer’s specs for Windows 10 through system information — Select the windows button from the keyboard and the “I” button together. A dialogue box will appear where you will be required to input “msinfo32” in the blank field, and press Enter. Every insight related to the computer’s specs will load on your screen.
Computer specs through command prompt
The computer’s specs for Windows 10 can be accessed by command prompt. The individual will have to right-click on the start button and select the command prompt. A screen will appear, and on inputting system info, a list of information will be displayed.