BitDefender is one of the most popular Antivirus program, available for Android, iOS, Windows, and Mac. If you are using BitDefender with Windows 10 OS then chances are higher that you are facing BitDefender Threat Scanner Error. Many Windows 10 users have reported this BitDefender Threat Scanner issue and that is why we are here to fix the issue.
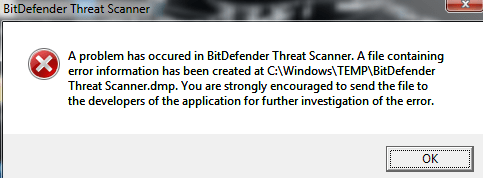
This error occurred due to a file that contains error information at c:/windows/temp/BitDefender Threat Scanner.dmp. The message is related to Threat Scanner.dmp file. You cannot access that file using your notepad. If you don’t close that message, your PC will restart. BitDefender Threat Scanner error occurs after installing the recent update. This dmp is one type of Spybot file that comes with BitDefender.
Fix BitDefender Threat Scanner Error
If you are searching for an immediate fix then you can get in touch with the Bitdefender Support. When a DLL error occurs on your computer you’re generally notified using a pop-up style error message that will tell you exactly what type of DLL error you’ve got.

Bitdefender Remove tool also enables you to remove them. It’s an entirely free removal tool you’re able to get from Bitdefender Labs! The best thing of Bitdefender Rootkit Removal tool is it does not demand a Safe Mode reboot.
We really love Spybot, but after using it on several computers, we found it difficult to trust in Spybot since there are several installation bugs. Bitdefender Threat Scanner.dmp error starts after upgrading Windows. You may need to replace the corrupted file to make your system working fine. Here are some working solutions to fix BitDefender Threat Scanner error.
Method 1: Run Patch
BitDefender Threat Scanner is a common issue and you can easily fix the issue. Follow these steps:
1. Open Run with Win + R and then type “Winver” in it to check Windows version.

2. Download a patch. If your System has 32-Bit Architecture, go , or download the patch from .
3, Once downloaded, run the patch.
Method 2: Uninstall and Reinstall Bitdefender
First of all, go to the Control panel and then go to uninstall programs.
Now find Bitdefender > Right click on it and then uninstall it.

Reboot PC and then download the latest version of Bitdefender. Install it and then you will see the error will be fixed automatically.
Method 3: Clear All the Temporary Files
Press Windows Key + R to open RUN and then type “%temp%“.
This will open a temporary files menu. Select all files and delete them all.
Method 4: Fix the Corrupted Files
1. Open this directory using File Explorer:
C:/Program Files (x86)/Spybot – Search & Destroy 2
2. Find this file SDAV.dll

If you cannot find it then download it from .
3. Once you finish downloading the file to the directory mentioned above.
4. However, if the file is already there, Right click on it > properties > Check the file size. if it is 32 kB then its okay and if not then replace it with the downloaded file.
Also Read:
Final Words
We have shared all the possible solutions to fix the BitDefender Threat Scanner issue. Comment below if you need any help.