
Gone are the days when recording a live stream was a tech-savvy if not very challenging task. Now, the internet is awash with programs that let you both stream live coverage and record it simultaneously.
All you need is a professional screen recorder to capture some quality, live streaming footage on your screen. To make it easier for you, we have reviewed and narrowed down the best software for how to record live streams on your Mac and Windows.
Give it a read and find out which program is best for you!
Part 1. How to Record a Live Stream on PC
If you quickly want to start a live stream on your PC and record it, then get . It gives you complete freedom to capture the whole screen or a specific area with tons of customization options.
The highlight of this tool is that it allows users to record and live stream at the same time using its “virtual camera” feature. The addition of the Live Streaming feature alone makes it a go-to choice for millions of users. Now, streaming your favorite clip live and recording it in real-time is at your fingertips. While recording, you can add a new window, pictures, or texts to the recording anytime with just one click.
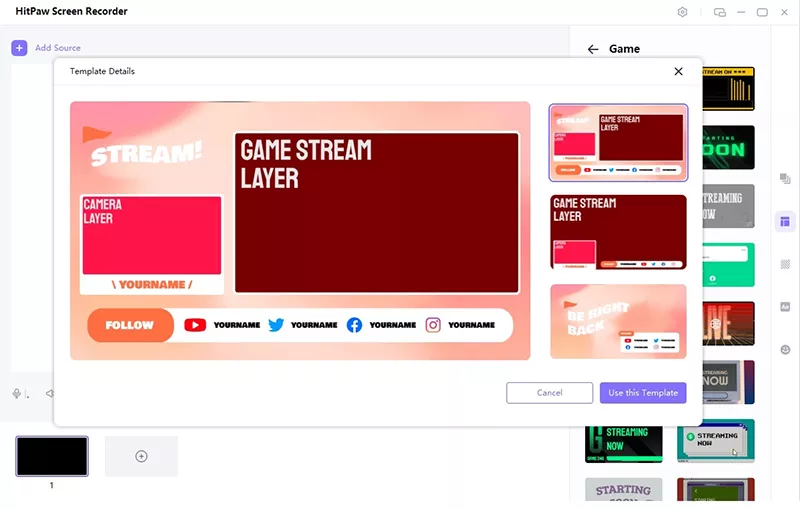
Thanks to its virtual background stickers, you can easily create stunning scenes as per your requirements. In addition, it comes loaded with a huge library of free templates to make your videos more captivating to the audience.
If you have a webcam, then use it to capture both your desktop screen and webcam simultaneously. Its other features allow you to , set scheduled and segment recordings, draw in real-time to highlight important details, and preview your recording anytime. With this tool, you won’t face any trouble with how to record a live stream on a PC.
All these impeccable utilities coupled with a sleek interface bode well with its popularity as a live streaming recording program.

Key Features
- Offers a click-through process to capture a live stream on your PC
- Tons of options to customize the recording screen
- Add templates, stickers, and texts to your recording
- Add built-in virtual backgrounds to make your ordinary videos look extraordinary
- You can draw in different colors and sizes using a mouse
- Record games and webcams
- Picture-in-picture mode for making tutorial videos
- Set scheduled recording and segment recording
- Offers a professional customer support service for free
Check out how easy it is to use this wonderful screen recorder:
Step 1. After installing the program, launch it on your computer.
Step 2. On its home interface, hit Life> Live Streaming. If you want to add a template, hit Templates and choose any template you like.
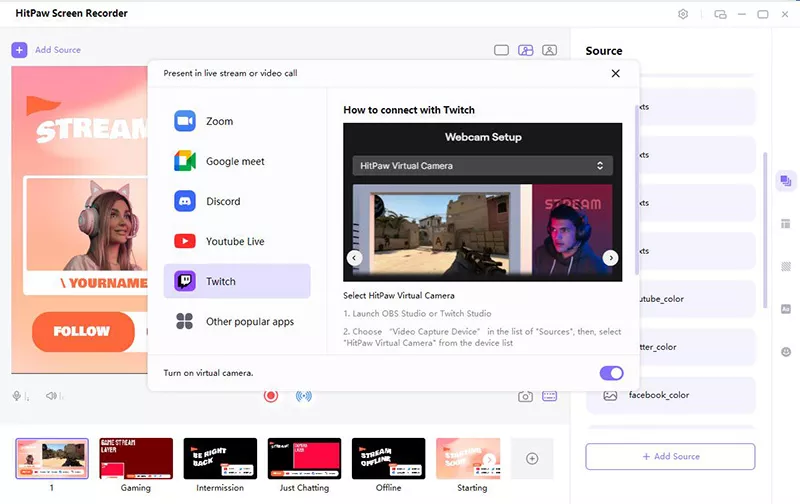
Step 3. Then, click on “Add Source” and select the type of live stream, be it Screen, Game, Webcam, or anything.

Customize the recording settings from the right tab.
Step 4. After that, open the live streaming platform and hit “HitPaw Virtual Camera” under the camera list.
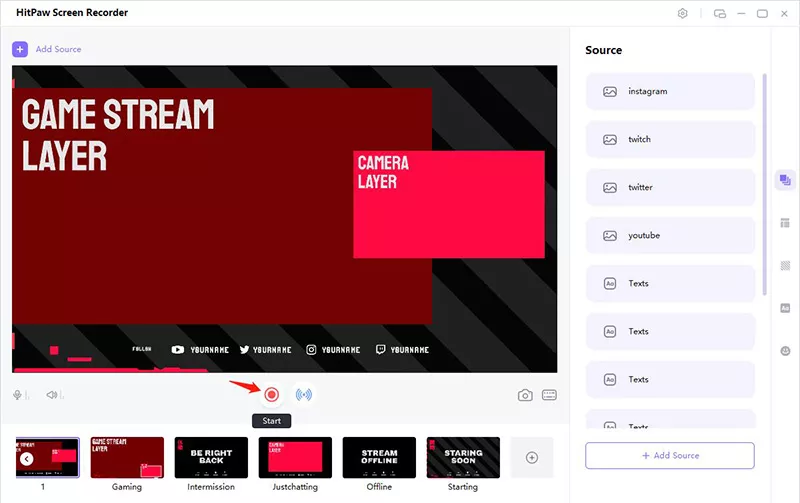
Step 5. Finally, click on Record on the main screen to begin recording.
Part 2. How to Record a Live Stream on Mac
A lot many users ask how to record a live stream on Mac without any tech-savvy procedure. While a lot of live stream recorders for Mac are available, our research found that Movavi Screen Recorder stands out from the rest.
This program is specifically developed for recording live streams on your Mac in good quality. Aside from that, you can create screencasts, set scheduled recordings, and show mouse movements and keystrokes during the recording which comes in handy for a tutorial or how-to videos.
As expected, this tool can also record webcams with or without your desktop screen and create quality output. After recording, it takes you to the editing interface to adjust your clip as needed. However, many users complain of video lagging, particularly while trying to capture the screen in HD.
Key Features
- Quick screen recording of live stream
- Create screencasts
- Scheduled recording ahead of time
- Gives quality output
- Users can export the recoded video in many popular video formats including MP4 and MKV
- Comes with a built-in video editor
- Instant social media sharing
Here’s how to record a live stream on Mac using Movavi:
Step 1. To begin, install Movavi Screen Recorder and run it on your Mac.
Step 2. Now, stream the live video and hit the Screen Recording icon. Then, select the screen area you want to capture.
Step 3. After that, hit REC to begin the recording in three seconds. Manage the video capture via the Pause/Play button.

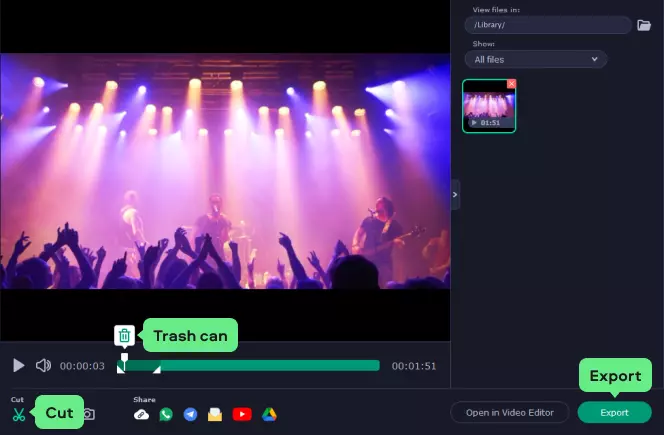
Step 4. When you’re done recording, hit the Stop icon to enter the editing interface.
Step 5. Cut the unwanted part of the video and hit Export to save it on your Mac.
Conclusion
Now that you know how to record live streams using two quality screen recorders, it’s time to decide which tool is best for you. Movavi is more famous as it has been around for many years, HitPaw Screen Recorder is efficient and feature-rich. The latter offers tons of advanced recording features including many stunning templates, aesthetic background stickers, and a virtual camera to live stream and record simultaneously. Plus, it is very easy to install and use for all users.
So choose a program that meets your requirements.