How many of you know how to transform your Windows Laptop into a Wi-Fi Hotspot? Well! Not many as per my guess. So, here a detailed description of transforming a Windows 8 laptop into a Wi-Fi Hotspot without using any third party software or tools. The procedure is simple and can be set up in just a few minutes. Once the setup is configured as guided, your laptop becomes a hub for wireless devices with instant internet access.
All you need to do is configure your hotspot according to your requirements! Creating a mobile hotspot is very simple in Windows 10 Anniversary Update builds. There are lots of solutions to hotspot on the market nowadays, but Connectify has garnered a superior audience as a result of its performance and an easy interface.
Connecting to the web is simpler than before, and should you have a couple standard items and are in the proper location, you need to be able to find completely free online access for your PC. Wireless networks enable a number of devices to use the exact web connection remotely, in addition to share files and other resources. Accessing the Internet by means of a public Wi-Fi connection can expose your personal info to users on the exact same connection. With one wireless router in your house, you can connect many computers to one another.
Windows 10 Laptop As Wi-Fi HotSpot
As I have already mentioned that this is software free technique. We don’t require any applications such as connectivity or wireless router etc. Below Is The Step By Step Procedure To Transform Your Windows Laptop Into a Wi-Fi Hub
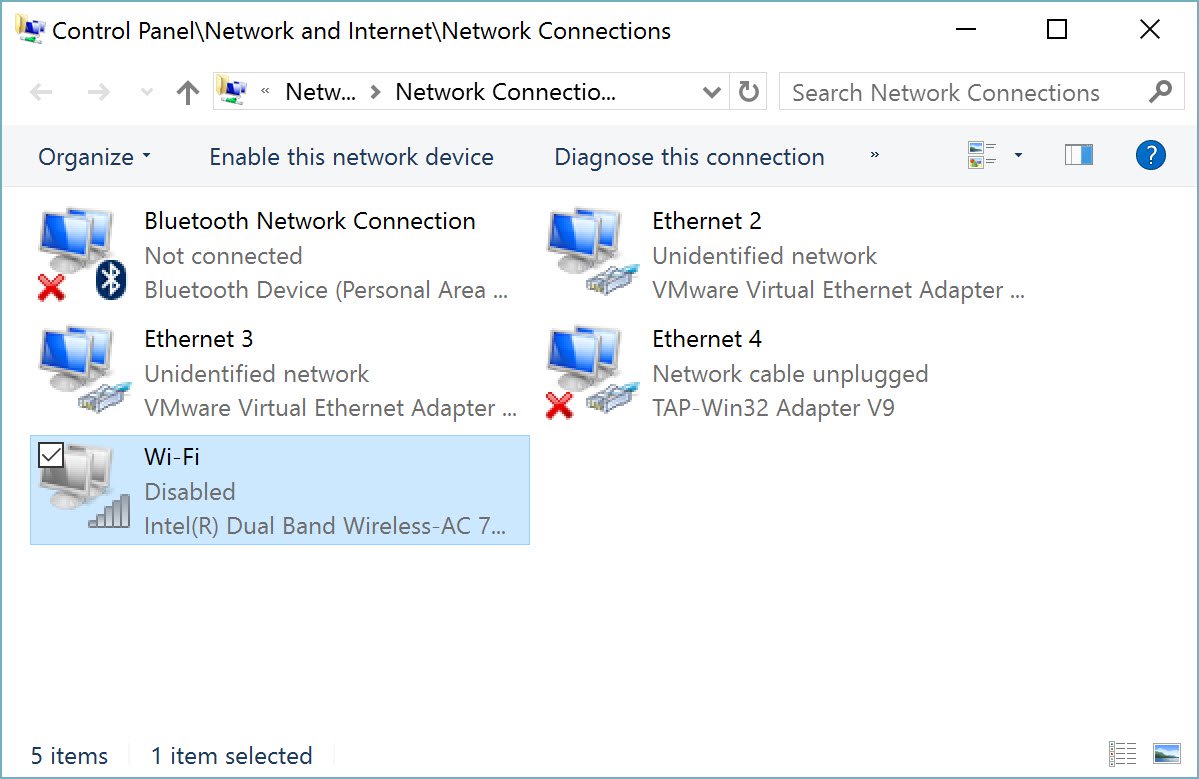
1. Go to Control Panel > Network and Internet > Network connections > sharing ( and in the pop up select “allow other users to use this computer”)

2. Now go to Command Prompt (Windows+R). After opening Command Prompt, three commands must be typed in it (remember to use command prompt in ADMIN mode)
The first command to type in Prompt
C:/Windows/system32>netsh wlan set hostednetwork mode=allow ssid=anyname key=password

SSID can be any name you wish to have along with the password and then press Enter. You will be getting a message saying SSID successfully changed and Key-phrase successfully changed.
Second command after this message :
C:/Windows/system32>netsh wlan start hostednetwork

Now you will get a message saying “The hostednetwork started”
Third Command and the final one :
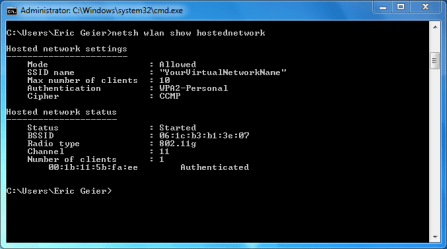
C:/Windows/system32>netsh wlan show hostednetwork
You are done now you should get a message as shown below
Boom!! Now go to any mobile device or any laptop and search for the Wi-Fi networks available. You should be having a network with the SSID name you gave. Now connect to the network with the password you gave in the SSID section. That’s it! You just did it all you need to do to transform your laptop into a Wi-Fi Hub.
