Now you can actually enjoy a strong Wi-Fi connection even at the deepest corners of the house. The Wi-Fi extenders help you to turn the dead zones of the house or a building into fun zones. The Wi-Fi range extenders by Netgear provides a reliable connection to keep all your devices like laptops, phones and media players connected. These range extenders expand the coverage of the Internet so that it reaches all parts of your home. Now the question arises- how to configure and setup Netgear wifi Extender? And the process of to Login Netgear Extender with default username and password.
So today we bring you the complete guide on the Netgear Wi-Fi Extender Setup. So go ahead and configure the Netgear Wi-Fi extender, and enjoy the Internet connection beyond its set limit.
Netgear Wi-Fi Extender Login using Ethernet Cable
You can connect your Netgear Extender with the help of an Ethernet Cable. Follow the steps given below to access the Extender manually with an Ethernet port.
Step 1: Connect your computer with the Netgear Wi-Fi extender using an Ethernet Cable.
Step 2: Now enter the following address in the web address bar of your browser- . Or you can also make use of the default 192.168.1.250 IP address.
Step 3: You will be asked to enter the username and password. Here are a few default login credentials that you can try, in case you do not remember them.
- Username- admin; Password- admin
- Username- admin; Password- password
Both username and password are case sensitive, so be careful while entering it.
Step 4: After logging in successfully, navigate to setup. Then click on Wireless settings.

Step 5: Now check the Password field. It should be similar to the password of your router. In case it is different, then change it.
Step 6: Click on apply to save the changes that you have made. And then reconnect your device to the Wi-Fi Extender.
This is one way by which you can complete the Netgear ac120 Wi-Fi range Extender setup. In case this doesn’t work, then try to restart your Extender once again.
Login Netgear WiFi Extender without Ethernet Port
Another way of Netgear extender installation is without Ethernet cable. This method is for those who have a Netgear Wi-Fi Extender without an Ethernet port. Here is the complete step-by-step guide to complete the process.
Step 1: To begin with, reset your Netgear Wi-Fi Extender to default factory settings. Press the Factory Settings button at the side panel and hold it for a few seconds.
Step 2: Now connect your system to the Wi-Fi Extender via Wi-Fi. Now login to the Netgear web interface.
Step 3: Open your web browser and in the address bar, type http://myWiFiext.net. Or you can also use the default IP address.
Step 4: Now enter the default login credentials. You can take help from the given below example-
- Username- admin; Password- admin
- Username- admin; Password- password
Step 5: Follow the setup wizard to set your connection. And make sure you do not use WPS while reconnecting.
Step 6: Now you are ready to reconnect all your devices with the Wi-Fi Extender.
How to Setup MyWiFiext Netgear Extender?
The mywifiext local Netgear Extender setup can be done following the given steps. Be careful while you opt for any of these methods for Netgear Extender login.
Step 1: Connect your Wi-Fi extender to the main power outlet. Now, wait until your device turn on.
Step 2: Now on your computer screen, at the taskbar, you will observe a wireless icon. Click on it.
Step 3: Choose Netgear.ext from the list of networks that appear. After you get connected, type http://myWiFiext.net and hit the Enter tab.
Step 4: Now select the New Extender setup. Here you will have to register the net gear through email. You can create a new account as asked.

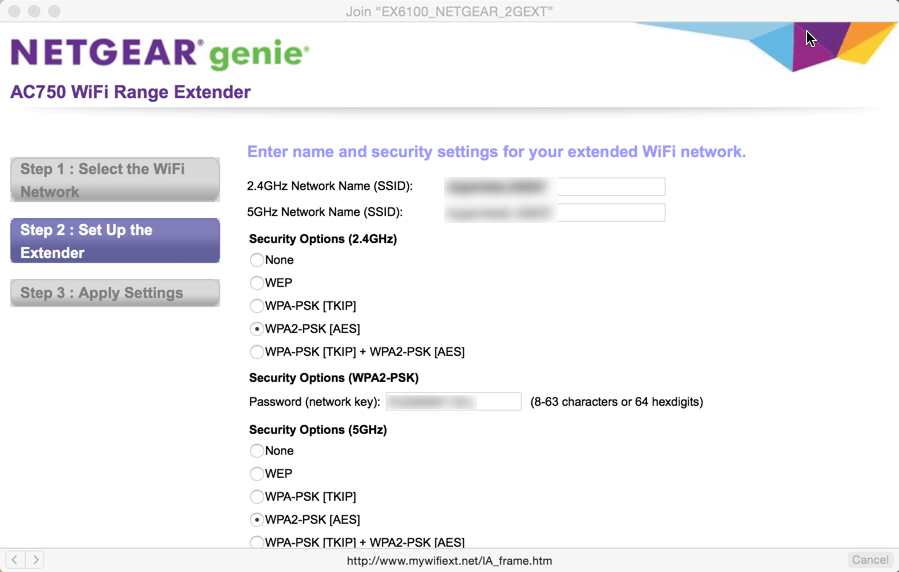
Step 5: Then when asked about “how you want to use the extender,” click on Wi-Fi range extender. Again a list of the wireless network will be displayed.

Step 6: Select the network name of your router. And then enter the password. Hit the Next option.
Step 7: So now you can also make changes in the settings of the system. Also, restart your system and the devices to save the changes.
Final Words
So guys, if it is Netgear ac750, N3000 Wi-Fi range extender setup or Netgear ex2700 setup (or any other model), with the help of this guide you can easily configure and setup Netgear Extender.
You can also take help of Netgear installation assistant for connection and Netgear Extender login. But in case you face problem during any step, then you can let us know in the comment section below.