Through this guide, I’ll teach you three easy methods on Screen Recording in Windows 11. In today’s world, technology has become the new norm in our day-to-day lives. Corporates have initiated work from home protocols and students are attending their classes through smartphones and notebooks. At a time like this when most learning and working happens online, screen recording is an invaluable tool. It’s okay if you don’t yet know how to go about it because,
Whether you are an IT professional looking to show your co-worker how to use new software, or an aspiring gamer hoping to kick-start your YouTube/Twitch career, knowing how to effectively record and share your screen will help you go a long way.
It’s important to keep in mind that the Windows 11 preview has just come out, so there is a possibility that Microsoft may roll out newer, more efficient screen recording tools in the coming weeks. So, I would advise you to keep checking this page, where I would be updating any new information.

Best Ways for Screen Recording in Windows 11
Let me go ahead and take you through the various screen recording methods that I personally use. Keep reading!
Screen Recording in Windows 11 using Xbox Game Bar
The Xbox Game Bar is the most commonly used tool for screen recording in Windows 11. This customizable overlay is built directly into the system, giving you instant access to screen capture features. Originally intended for gaming, it is now used widely due to its convenience and accessibility.
Steps to use Xbox Game Bar:
Step 1: Click Windows key + G to bring up the Xbox Game Bar.
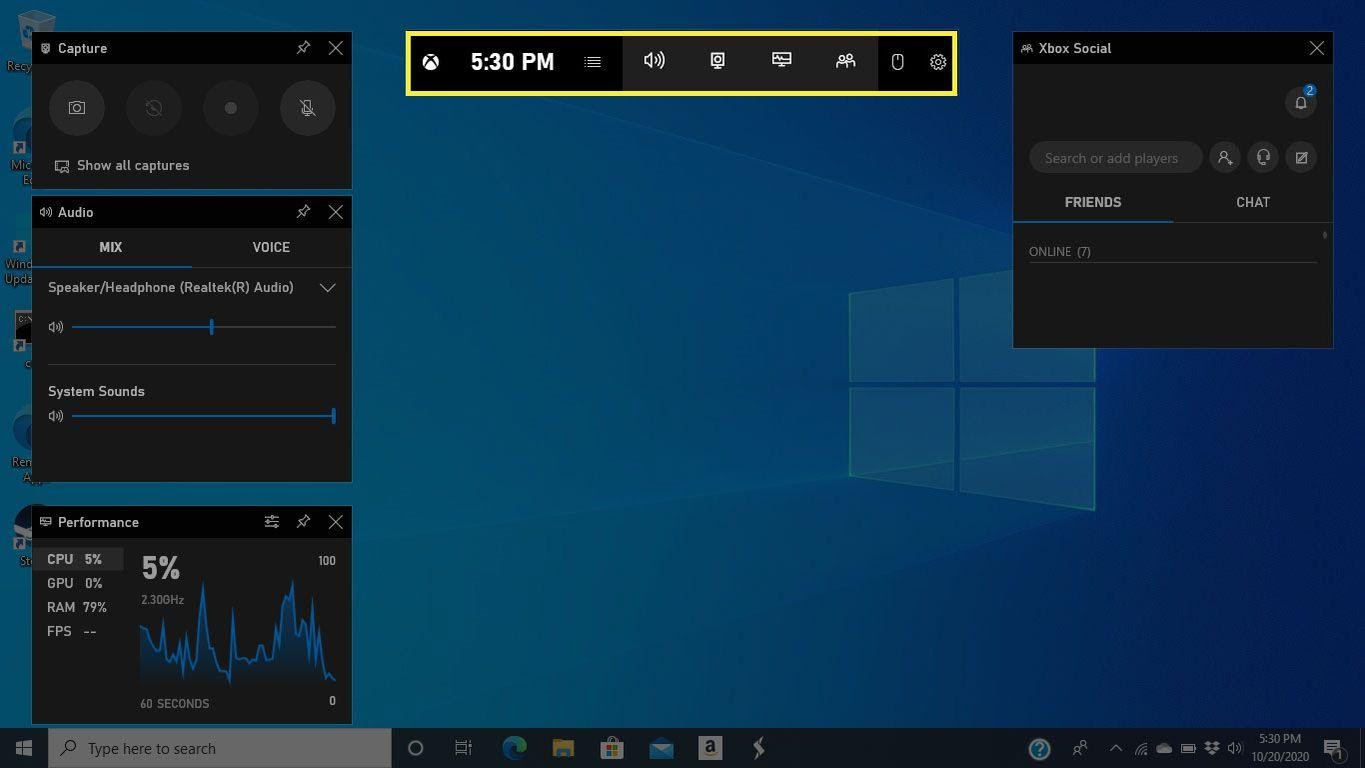
Step 2: It might look complicated at first, but trust me, it’s extremely easy. The top left corner contains the screen recording options.
Step 3: The camera icon in the corner allows you to take a screenshot of the app open.
Step 4: The small circle icon is the Start Recording button. Clicking it will begin the recording, and minimize the game bar.
Step 5: A timer will show up through a small bar that indicates the recording time. You can configure your microphone settings here.
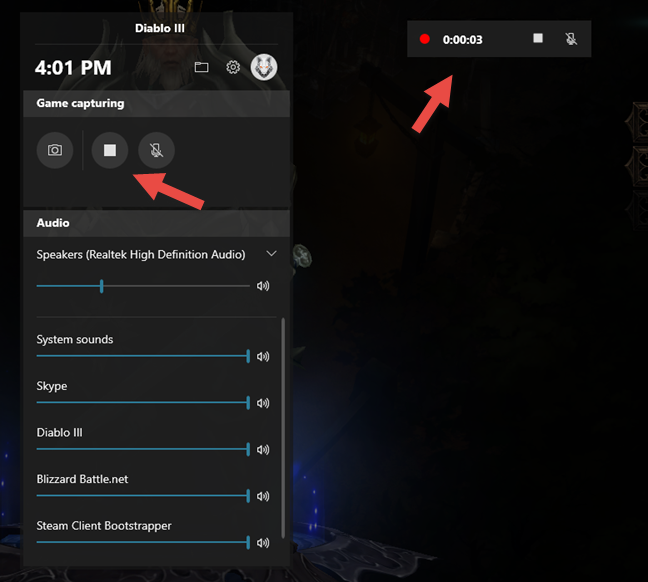
Step 6: Click the square button to end the recording. You will receive a notification informing you that the recording has been saved.
Step 7: Click on the notification to watch the recorded video. Here, you will also find options to share your recording with your friends through various social media.
Enabling Auto-Record on Xbox Game Bar: (particularly for Gamers)
During intense, fast-paced gaming, we often forget to turn on screen record and miss out on reliving our best moments. Worry no more, as the Xbox Game Bar offers us a screen recording feature tailor-made for this purpose. Here’s how you can activate this feature to capture parts of your gameplay.
Step 1: In the Xbox Game bar, open settings and navigate to the Capturing option.
Step 2: Click on “Record in the background while I am playing a game.”
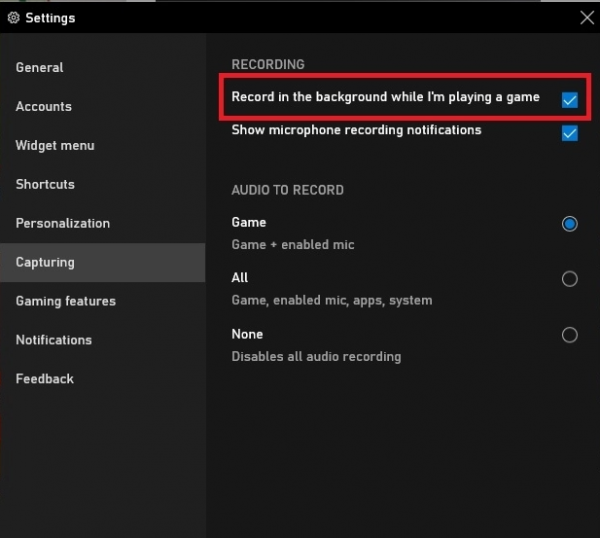
Step 3: Now, every time you open a game, the program will automatically record it in the background.
Step 4: You also have an option to do this for other applications as well. Once you have the desired application open, click Windows key + G, then go to the General tab and select the option for “Remember this is a game.”
Important Notes:
- I will give you a quick, handy shortcut for this application. Just click on Windows + Alt + R. This shortcut will directly start the screen recording without having to open the Xbox Game Bar.
- A drawback to the Xbox Game Bar is that it cannot be used to screen record your Desktop or File Explorer. It only works on open Applications.
Screen Recording in Windows 11 with Microsoft PowerPoint
Screen Recording with PowerPoint! Surprised? So was I when I first found out! Most users do not know that the Microsoft PowerPoint application can also be used as a Screen Recording Tool for Windows 11.
I will show you how to access and use this feature in a few easy steps.
Step 1: Open MS PowerPoint and go to the slide where you would like the screen recording.
Step 2: Select the Insert tab on the top, and navigate to the Screen Recording option.

Step 3: Here you will find an option called “Select Area”. Use this to set the screen area you would like to record. If you would like to record the whole screen instead, use the shortcut Windows key + Shift + F.

Step 4: Once you select the desired area, click on the record button (Windows key + Shift + R).
Step 5: There are three options to manage your recordings: Pause (to temporarily stop recording), Record (to resume recording), and Stop (to end the recording).

Step 6: Once you’re done, you can save the recording by clicking on File > Save. Ta-da! Your screen recording is now available on your desired slide.
Step 7: If you would like to save the recording as a separate file on your PC, right-click the recording on your slide and select “Save Media as”. Here you can name the file, select the folder location, and click on Save.
Screen Recording in Windows 11 with OBS Studio

Now we come to one of the best Screen Recorders for Windows 11: Open Broadcaster Software Studio also called OBS Studio. I have used this application quite a few times to record my own gameplays. The features and level of control truly impressed me.
First-time users might find this software a bit daunting with its myriad of options and tabs and tools, but I will assist you step by step on how you can make use of OBS Studio for screen recording in Windows 11.
Step 1: The first step is to download and install OBS Studio on your PC. You can visit this link to find the software:
Step 2: Open OBS Studio, and you should see a window like the one shown below.
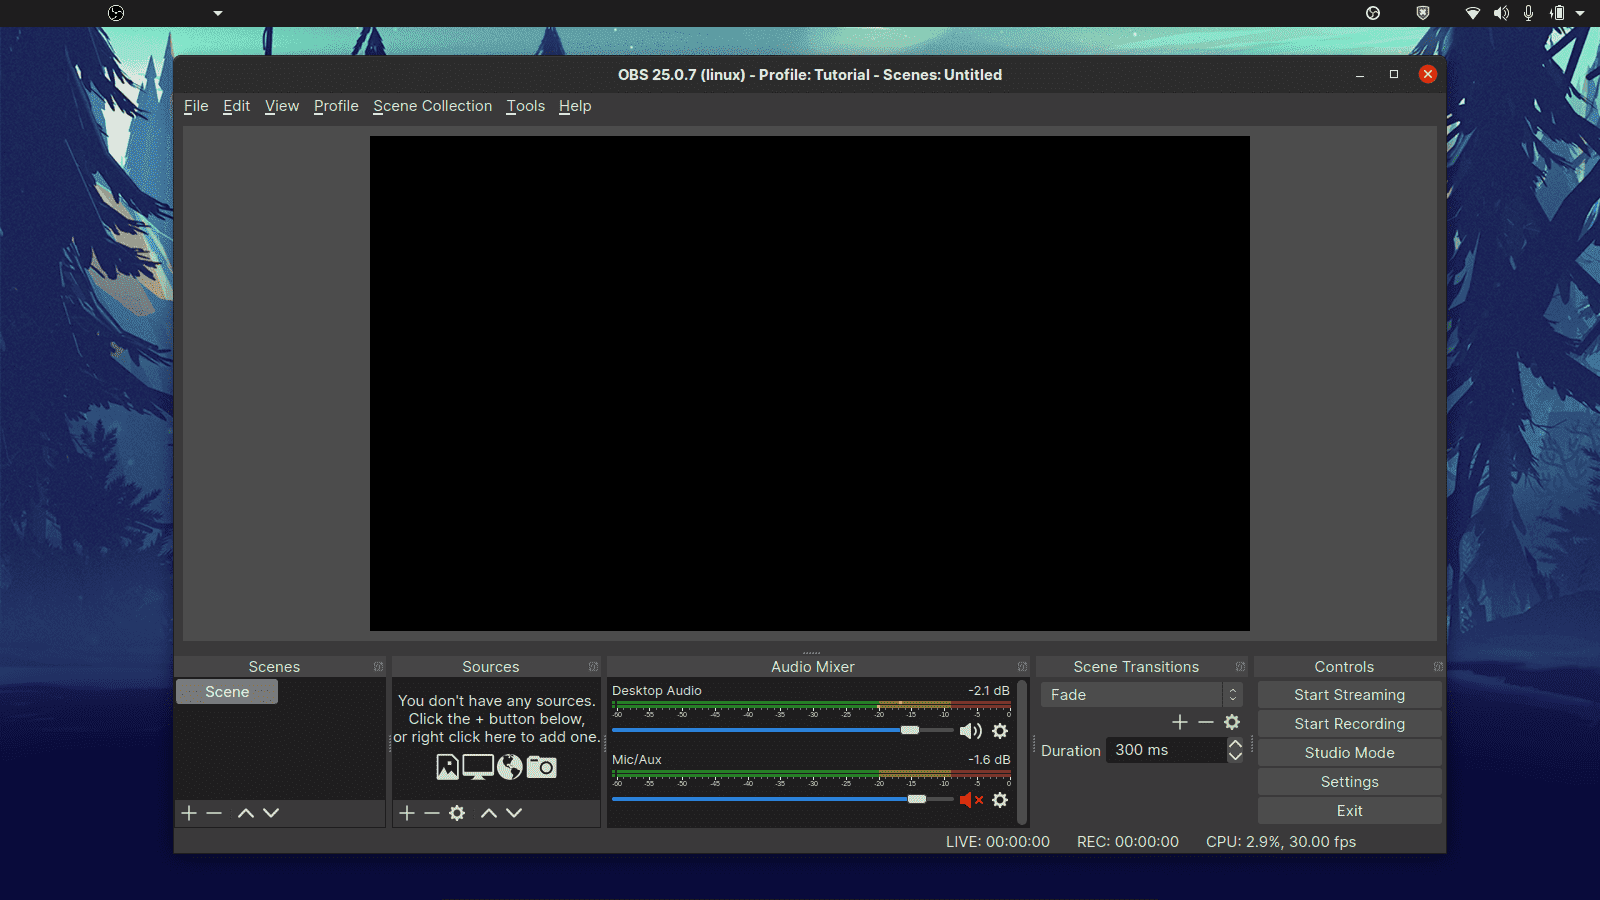
Step 3: To begin recording, you will have to first add a source. The source decides which inputs are used for the recording (e.g. Screen, Webcam, Microphone, etc).
Step 4: Navigate to the Source tab at the bottom left side, and click the ‘+’ button.
Step 5: Click on ‘Display Capture’, and then click ‘Okay’ on the next two popups.
Step 6: Once this is done, click the settings option on the bottom right corner. Navigate to the output tab on the left side, and you can set a “Recording Path” here which will decide where your screen recording will be saved.
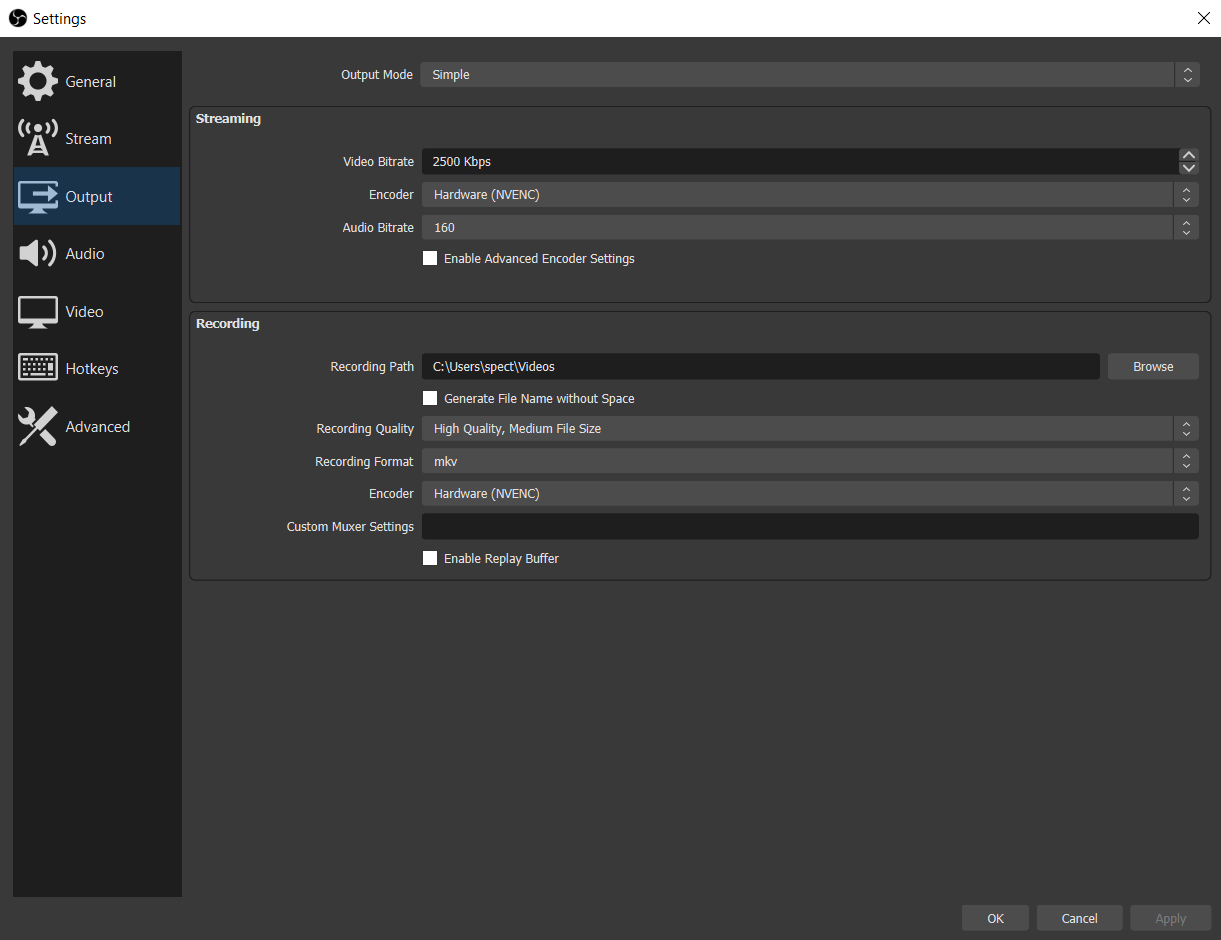
Step 7: Once you’re ready to begin recording, click on “Start Recording” at the bottom right. Similarly, select “Stop Recording” to complete the process.
Conclusion
I hope you have gone through the guide and understood the various methods to use for Screen Recording in Windows 11. As I mentioned in the introduction, Windows 11 might introduce newer tools to make screen recording more convenient for users. I will be updating the guide to keep up with the information we receive.
Until then, you can experiment with the methods that we have mentioned above and let us know your experience in the comments below! Happy Recording!
